Nursery
Upright Evergreens for Living Fences
Use these Evergreens for Living Fences
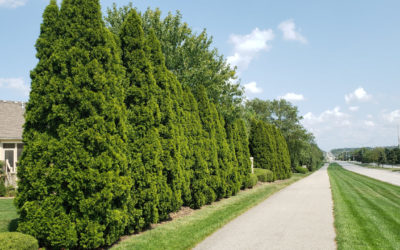
Planting a living fence can be a low-maintenance way to privacy from an annoying neighbor or disturbing traffic noise. Green fences, especially when they are evergreen, can provide a year-round buffer from wind and noise, create shade, and add beauty. Planting an evergreen living fence will allow families to enjoy their yards year-round without feeling like their family activities are on display.
There are many choices when searching for the ideal tree for a border screening, a sound barrier, or a windbreak. It’s best to begin your quest by measuring your area to determine how much or how little room you have available. Choose plants that fit the space at maturity to avoid maintenance and overcrowding. Learning the growth habit, height, and width at maturity is essential to match the best plants for your conditions. Here are a few of Uncle’s Idiot-Proof evergreen plants for living fences.
Green Giant Arborvitae
Green Giant Arborvitae is Uncle’s favorite backyard screen. It’s considered one of the best evergreen trees for privacy. This western red cedar is fast-growing and can provide privacy quickly. Cold hardy to our region, the Green Giant can survive harsh conditions and tolerant of pests and disease. The uniform, natural cone shape requires very little pruning. Height: 30’-40’ Width: 5’-8’ Spacing: 10’-12’


Upright Juniper
Upright junipers work very well as a screen. Hardy varieties include the Caenarti, Hetzi, Spartan, and Taylor Juniper. The Caenarti, also known as red cedar, has the best drought resistance. They reach a mature height of twenty to thirty feet and width of up to fifteen feet, making Caenarti ideal for larger open areas. Hetzi and Spartan junipers make excellent windbreaks reaching fifteen to twenty feet with a width of only four to six feet.
Taylor Juniper
The semi-soft, blue-green foliage and narrow columnar form provide a refined, elegant look. This handsome selection maintains a more dense, upright form than its similar counterparts. Makes a great privacy screen, an entryway accent, or a dramatic vertical element to the landscape—a Nebraska Statewide Arboretum introduction. Evergreen. Height: 30’ Width: 3’ Spacing: 4’


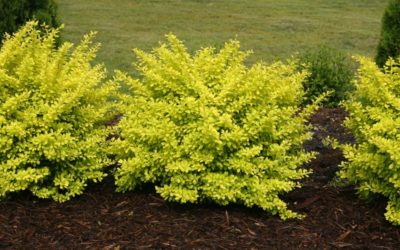
Fine Line® Fern Leaf Buckthorn
Although not an evergreen, Fine Line® Fern Leaf Buckthorn, a Proven Winners introduction gets an honorable mention from Uncle. The lacy fern-like foliage combined with a narrow columnar habit makes this an excellent plant for adding texture and shape to the garden. Foliage turns yellow in fall. Ideal as a narrow hedge, accent specimen, and to frame doors and pathways. Height: 5’-7’ Width: 2’-4’ Spacing: 2’-3’
Emerald Green Arborvitae
Emerald Green Arborvitae is another of Uncle’s favorites. Half the size of its cousin, the Green Giant, Emerald Green, is ideal for small yards or narrow corridors. Emerald Green is low maintenance reaching a mature height of 12 to 15 feet. Slower in growth rate than its cousin, the Emerald Green average growth rate of six to nine inches makes it an excellent choice for tight spaces. Height: 12’-15’ Width: 3’-4’ Spacing: 4’-5’

Planting Living Fences
The best time to plant a tree was twenty years ago. The next best is today. Spring and Fall are the right times to plant, and we have truckloads of Idiot-Proof trees and bushes for your landscape. Get off your duff and bring your measurements to the Grass Pad. Our experienced nursery staff can help you find the right tree for your conditions.
More Articles related to Evergreen Trees:
Uncle’s Root Accelerator – Keeping Plants Healthy
- Uncle’s Root Accelerator gives plants a healthy start. Learn More at this Link
Uncle’s Max Mix – The Secret is in the Soil
- Uncle’s Max Mix is a premium-grade horticultural planting mix. Learn More at this Link
Grass Pad Nursery Stock
- Search Idiot-Proof plant selections available at Grass Pad. Learn more at this link.
How to Fertilize for Healthy Trees and Shrubs
- Tips for fertilizing new and existing shrubs in landscapes. Learn more at this link.
Guide to Planting Trees and Shrubs
- How to plant trees and shrubs for best results. Learn more at this link.

How to Bring in a Sample
If you have a problem in your lawn or landscape, the Grass Pad has the knowledge and products to steer you in the right direction. Over the last 60 years, our staff has come across almost every lawn problem imaginable. In our experience, 99% of all the problem spots in turf fall into 1 of 4 categories.
- Drought – Rarely just a spot, but more likely a general browning of a large area. Early signs of drought stress can be detected by the turf color. Dry spots turn a noticeably darker shade of green eventually fading to a bluish gray. And, if you cannot push a screwdriver in the ground 6 inches without a hammer, lack of moisture is probably the cause.
- Fungus or turf disease – Most frequently shows up as patches where it transitions from perfect turf to brown grass over a short period, almost overnight, and continually expands. Occasionally lawn diseases can show up as general browning where it appears only 60 to 80% of grass turns brown. This look is similar to the appearance of drought stress. With no recent rain or irrigation, the screwdriver test will tell the difference. When you pull on the grass from diseased areas, the grass remains rooted, and it isn’t easy to pull out of the soil.
- Insect – Damage can come from grubs that eat the roots and live underground. When you tug on the brown spot, the grass comes up like a loose piece of carpet with soil attached to the bottom. Other insects that live on the soil’s surface can feed on the parts of the grass plant above ground. When you tug on this type of damaged turf, it comes up easily and has no soil attached, almost like grass clippings. Further investigation frequently reveals a caterpillar or maybe a tiny tunnel or hole with spider web looking material or caterpillar feces present.
- Spills – Something like gas, salt, pet urine, a misapplication of weed control, or fertilizer. Always check for loose gas caps and never fill the gas tank while the mower is on the grass. Move it to the driveway or sidewalk to refill.
Run through these scenarios, and you may be able to self-diagnosis your issues. These by no means identify all problems, but we find it gets most. If you suspect a disease, bring in samples of the browning grass in a sandwich bag. Try to get grass blades from the edge of the spot that is part green and part brown. Pictures took up close, and from a few steps away can also help. We like to be hands-on when it comes to diagnosing the problem. We get the questions every season, and sometimes, explaining the problem over the phone just isn’t the same as seeing it up close. Bringing the issue to us is easy and painless.

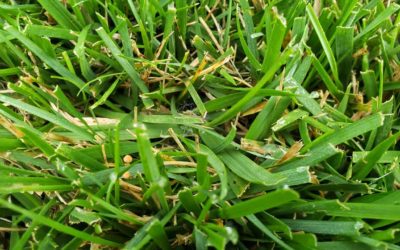
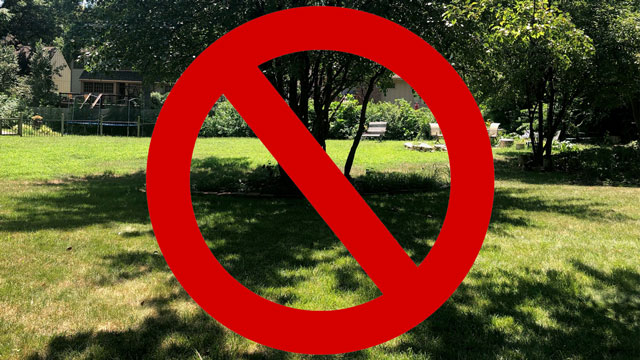
How to Take a Picture of Grass and Weeds
If you would like us to identify a specific type of grass or weed, a sample works best. If you can’t provide a sample, then an extreme closeup picture of the plant is the next best option. It’s very hard to identify a grass type or weed from a distance. However, if you need advice on what to do for your lawn, it’s best to take a wide-angled picture of the yard so we can see how thick the grass is, how much shade you have, and any other factors.
Bad Example of a Weed Photo
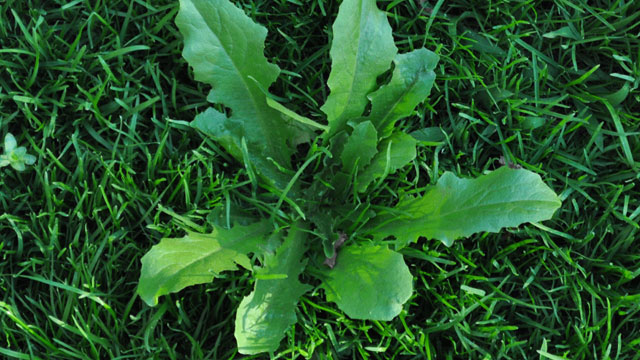
Good Example of a Weed Photo
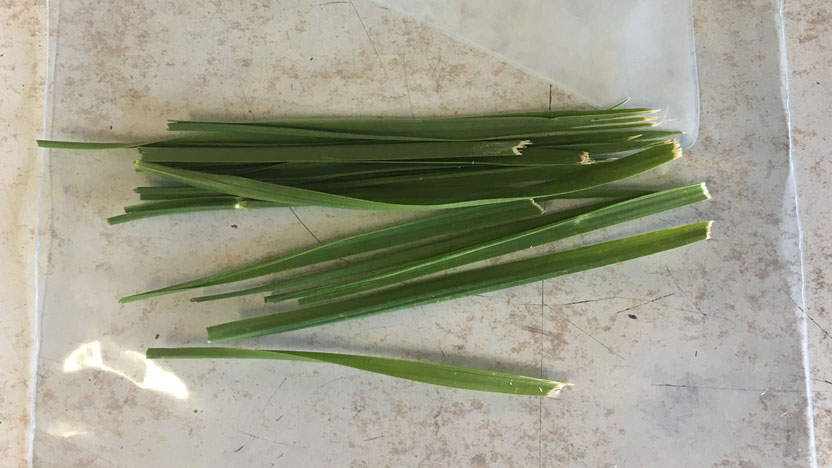
How to Bring in a Grass Sample
If you are looking for us to help identify what kind of turfgrass you have, bring in a handful of freshly picked blades of the grass and we can tell you what it is and how to grow it. If you are buying new grass seed for overseeding and want to match your current lawn, it can be a good idea to bring a sample from several different areas of the lawn. Over time our yards can get reseeded with several types of grass and it’s good to know what grows well in different areas of the yard. A good method for bringing in a sample is to grab a handful of grass blades from each section of the yard and bring them in labeled plastic bags.
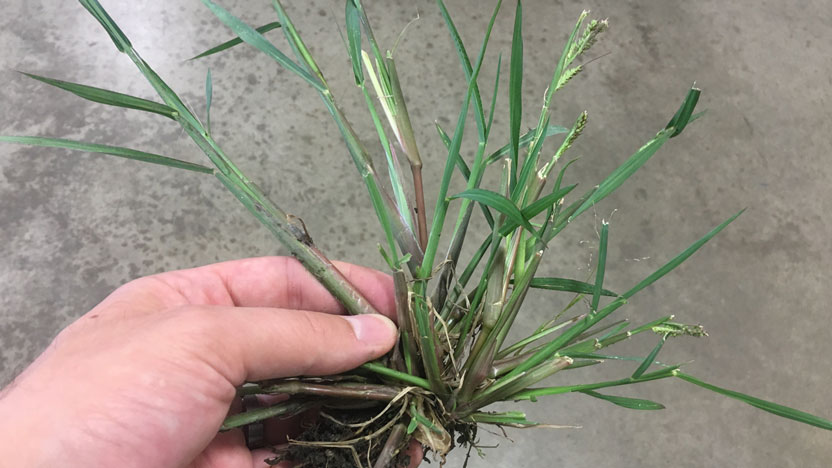
How to Bring in a Weed Sample
Pick the weed right out of the yard and bring it into one of our locations for us to look at. The weed needs to be green and growing – we can’t identify much from a dead plant. Try to bring the entire weed plant in if possible – roots, stem and leaves. We will try to identify it and get you the products and advice you need to be successful in killing the weed.
How to Bring in Samples of Turf Disease
Brown, yellow, gray or any other wacky colored spots in the yard? Turf disease can be a bit more difficult to identify unless we have both the healthy and the sick grass. Pick out some fresh grass blade samples from the middle of the diseased spots, and just around the outside of the spot to where the grass appears to be healthy. Having a sample of this transition zone from healthy to sick helps us identify what is going on with the grass. Bringing in a picture of the affected area can also help us identify if there’s something in the environment that may be causing the issue.
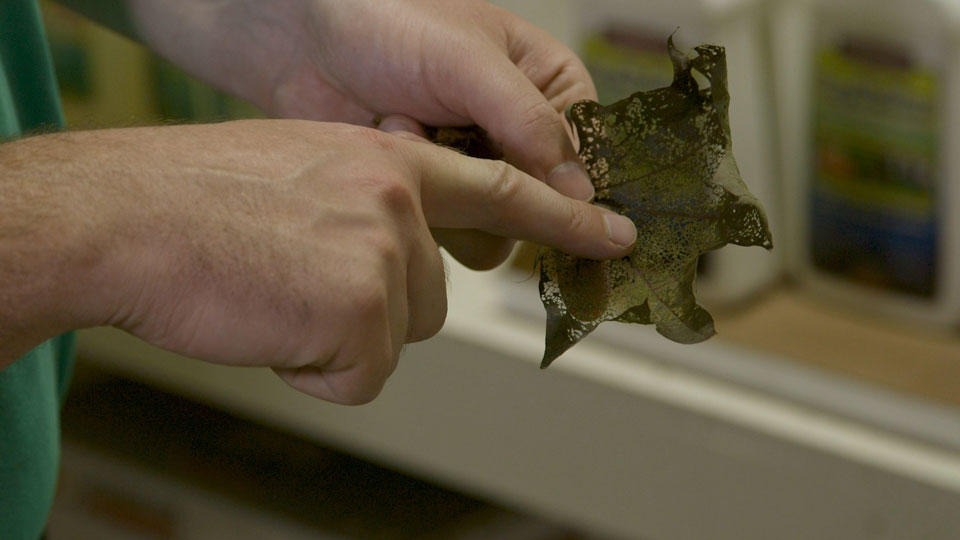
Bringing in Samples of Plants or Shrubs
The same method applies to items in your landscape. If you have a tree or shrub that has weird looking spots or holes on the leaves, snip part of the plant off and bring it into one of our stores. We like to see parts of the plant that have been affected as well as parts that still look healthy. That will help us get a better idea of what we see that’s going on. Also, putting the sample in a sealed plastic bag and keeping it cool will help preserve the sample, making identification much easier.
It’s good to get out in the yard and it’s even better when the yard is trouble free. Don’t be afraid to head on down to the Grass Pad to get the expert advice and quality products you need to continue to have the best-looking lawn in the neighborhood.
See Related: Fruit Tree Care
Starting Garden Seeds Indoors
Grow Your Own Victory Garden
Growing your own garden can be economical, healthy, fun, and educational for the whole family, plus you get tomatoes! Gardening can be that break you need from the hustle and bustle of the workweek. Gardening can be the connection you were looking for to get your child away from the X-Box. Dropping a seed in some dirt can do miracles for your health, family, and your pocketbook.
In the beginning, you might feel overwhelmed by the plethora of gardening catalogs and websites, so it’s best to start by trial and error. Here are a few idiot-proof tips for starting seeds indoors that will boost the beginning gardener’s success rate and confidence.
As the season progresses, Grass Pad nurseries will have vegetable transplants available for those that don’t have the room around the house to start your plants. Grass Pad carries all the most common vegetables in many varieties – things like tomatoes, peppers, squash, eggplant, and all the types of herbs will be available in plant form. Date of availability will depend on weather, so call your local Grass Pad for more information on when to expect these plants.
Tools for Starting Garden Seeds
Getting started growing your own gardens is almost idiot proof. These are the all the tools you will need to get started:
- Garden seed packs
- Transplanting trays
- Seed starting pots
- Soil-less seed starting mix
- Watering can
- Labels
- Marking pen


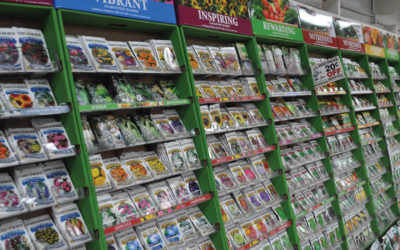
Making Your Seed Selection
Begin by making your seed selections early, come to the Grass Pad and wander through the thousands of new and heirloom vegetable and flower seed packs. Feel free to bring mail-order catalogs along for ideas and compare prices. Things to ponder, how much area will you be planting? And do you have full sun or shade areas?
Don’t use old seeds. The older seeds become, the less likely they are to sprout. Always look on the back of the pack for the “sell-by date,” planting depth, spacing, sunlight, maturity dates, and gardening tips for each variety. At Grass Pad, we receive fresh shipments of flower and garden seed packs at the beginning of each season and continue to refresh our seed racks regularly throughout the seasons.
When to Move Seeds Outside
Seedlings can be transferred outdoors when the temperatures are warm enough to support them. If you start seeds too early, you may need to “shift up” – or move the baby plants to larger pots to allow for more root growth before moving them outside.
In our area the average date of last frost is Mother’s Day. Check the planting chart on the back of the seed packet for the seed starting date.

Hardening Seedlings Before Moving Outside
The transition from inside to outside can be one of the most difficult parts of starting seeds indoors. If the move is too abrupt it can cause problems with the plant. For best results, follow these tips:
- Start moving the plants outside during the day and bring them in each night.
- Begin the transition stage 1-2 weeks before permanently moving them outdoors.
- Place the plants outside in a shady spot during the day. Increase the amount of sun the plants receive gradually each day.
- Avoid windy days and cold weather during the hardening process.
- Slowly reduce the watering schedule of the plant, but don’t allow them to wilt.

Choosing Your Growing Pot
You can start seeds in open trays, in individual plastic packs, or peat pots. Different containers are best because the less you disturb baby roots, the better. Some containers, such as peat pots, transplant right into the garden with the plant during transplanting. Plastic pots must be removed before transplanting.
At Grass Pad we have pre-assembled plant starting kits that include the plant tray, plant pack, dome and starter mix. All you need is the garden seeds of your choice.
Use Seed Starting Mix
Pro-MIX BX seed-starting mix is best for starting seeds indoors. Avoid potting soils with fertilizers – these are meant for mature plants and may do more harm than good for starting seeds. PRO-MIX BX is a solution for growers seeking to benefit from both the nutrient holding ability of vermiculite and a perlite content providing good drainage. Mixed with high-quality fibrous peat moss, this formulation is ideal for growers looking for a general purpose medium which creates a well-balanced growing environment.

Real Christmas Trees at All Grass Pads
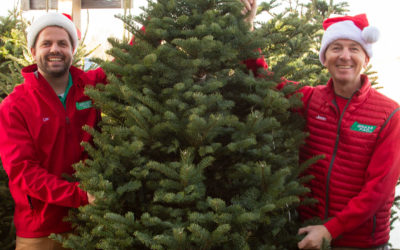
Real vs. Fake Christmas Trees
Uncle says, NO PLASTIC TREES! Each holiday season news articles, web sites and commentators debate whether it is better for the environment to use a plastic artificial Christmas tree or a real Christmas tree. Uncle says “be green and buy real green”. A real Christmas tree is five times more environmentally compatible than a plastic artificial Christmas tree.

How Long Does a Real Christmas Tree Last?
With proper care, a real Christmas tree will last about five to six weeks indoors. To ensure the longest life from the tree, be sure to follow Uncle’s tips on Christmas tree preservation:
Remove Loose Needles – Through the natural growing process of evergreen trees, the tree will have pre-existing needle loss on interior branches. Tapping the tree trunk firmly against the ground and shaking it will remove most of the needles.
Reduce Needle Drop – Use Wilt-Pruf, an antitranspirant, to slow moisture evaporation from the needles. Before bringing the tree into the house, spray Wilt-Pruf to thoroughly coat needles to reduce premature needle loss.
Preserve Tree Moisture – Making sure the tree has water in the stand at all times will ensure that the tree lives as long as possible.
Use Uncle’s Tree Life Kit – This special formula is designed to feed your tree while it is in the stand. Place the tree into the stand or bucket within one hour of a fresh cut. Mix Tree Life with warm water at the recommended ratio and fill the stand or bucket. Check the solution every 8-12 hours for the first 3 days and re-fill to keep at max capacity.
Tree Placement – For maximum needle retention, place the fresh cut Christmas tree away from any home appliance or areas that produce heat or drafts. This includes fireplaces, radiators, vents and TVs or stereo systems.
Types of Real Christmas Trees
There are a couple types of Christmas trees available for sale at the Grass Pad – the different types work well for different situations. See below for more info about the types we will have in stock this year.
Oregon Noble Fir
– Most desired of all varieties
– Rich blue-ish green with a hint of silver
– Best for heavy ornaments
– Layered branching
– Pleasant aromatic scent
– Best needle retention
– Excellent for wreaths and garland
Northern Fraser Fir
– Popular value priced tree
– Open branching
– Dark blue-green needles
– Good for heavy ornaments
– Pleasant fragrance
– Good needle retention

There are more than 4,000 Christmas tree recycling programs throughout the United States. Plastic artificial Christmas trees are a petroleum-based, non-biodegradable product manufactured primarily in Chinese factories. Eighty percent (80%) of artificial Christmas trees worldwide are manufactured in China.
Real Christmas Trees:
– Are Recyclable
– Are Biodegradable
– Are 100% Grown in the USA
– Absorb Carbon Dioxide
– Emit Oxygen
– Help Stabilize Soil
– Provide Wildlife Refuge
– Protect Water Supplies
– Are more Eco-Friendly
How to Plant Spring Flowering Bulbs
Buying Spring Bulbs
When: At the Grass Pad we begin to stock our spring-flowering bulbs around the first of September, and we’d suggest buying them as soon as they become available. This will allow you to store them in ideal conditions in a cool, dark, dry place with good air circulation until it’s time to plant.
Location: Not all bulbs are alike when it comes to growing conditions and appearance. When choosing bulbs, keep the planting site in mind. Today’s selection of bulb extends far beyond your standard daffodils, hyacinth, iris, lily and tulips. Crocus, alliums, snowdrops and scilla have all seen an increase in popularity in the last few years.
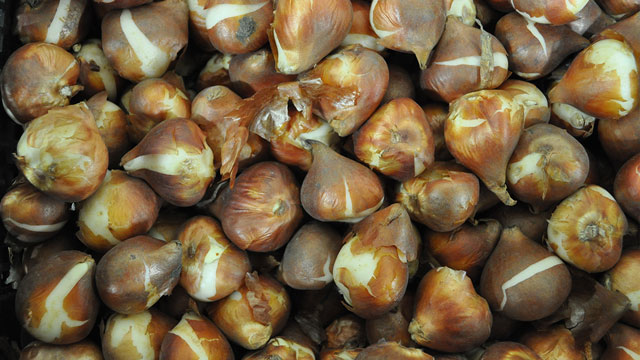
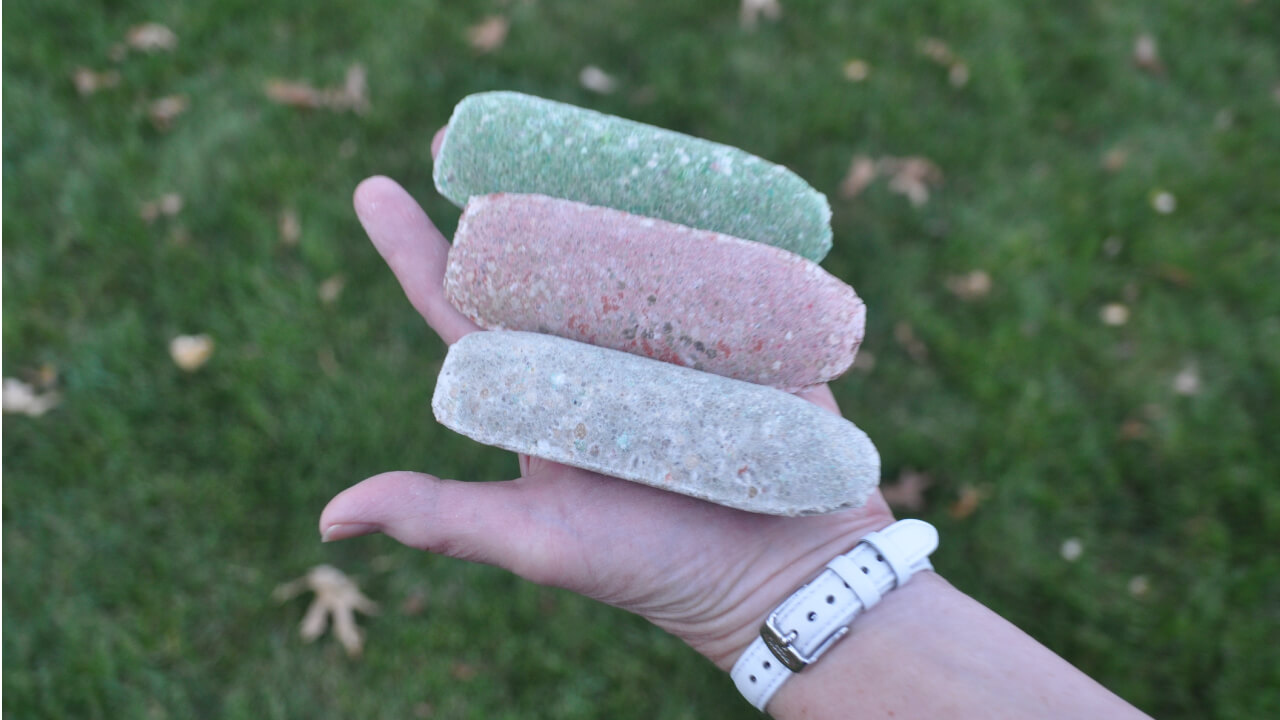
Size: Bulbs are graded by the grower based on their diameter, so you’ll likely get the best performance from the ones that are large for their type. Since bulb size may differ by variety, be sure you’re only comparing a bulb against others of the same variety.
Condition: Don’t worry if the bulb’s papery skin is a bit ripped; that won’t affect its performance. However, do avoid bulbs with deep cuts, bruises or soft spots, as these injuries provide an invitation for disease. Likewise, try to avoid ones with significant signs of mold or rot.
Where to Plant Spring Bulbs
Bulbs can be planted in borders, perennial gardens, rock gardens, woodland settings, natural lawns and even in patio containers. Wherever you choose to plant them, you’ll want to remember that most bulbs prefer well-drained soil and full sun. Avoid areas and containers where water tends to puddle. In addition, bulbs need warmth and light to trigger their spring growth.

While many people enjoy the natural look of planting bulbs in their lawns, it’s crucial that you choose spots that won’t need mowing during the early spring. Once the flowers have faded, you’ll need to allow the foliage to continue to grow for up to six weeks before it dies back; this ensures a strong return the following spring.
When to Plant Spring Blooming Bulbs
Plant bulbs before the ground freezes in the fall. They’ll do best if they have some time to establish roots before any extreme cold weather arrives, which means mid-October through November. It’s always best to come and pick out your bulbs in September or October to ensure that you get the best variety to choose from.
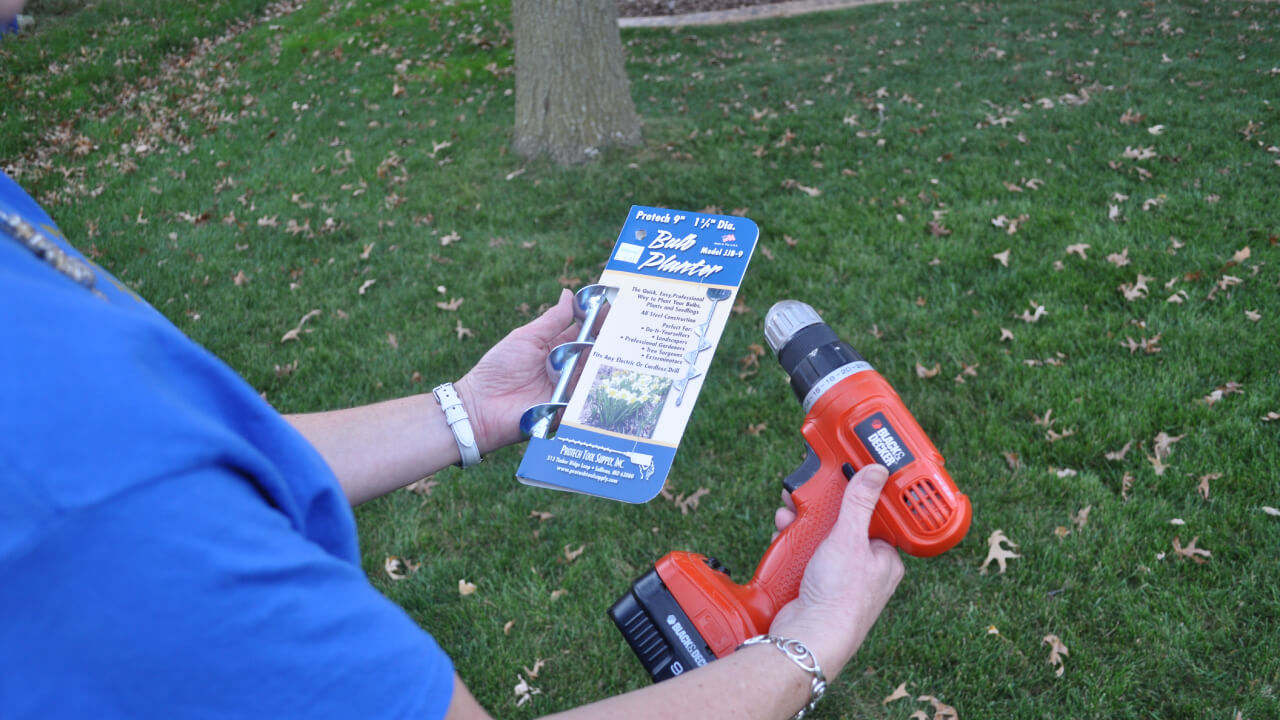
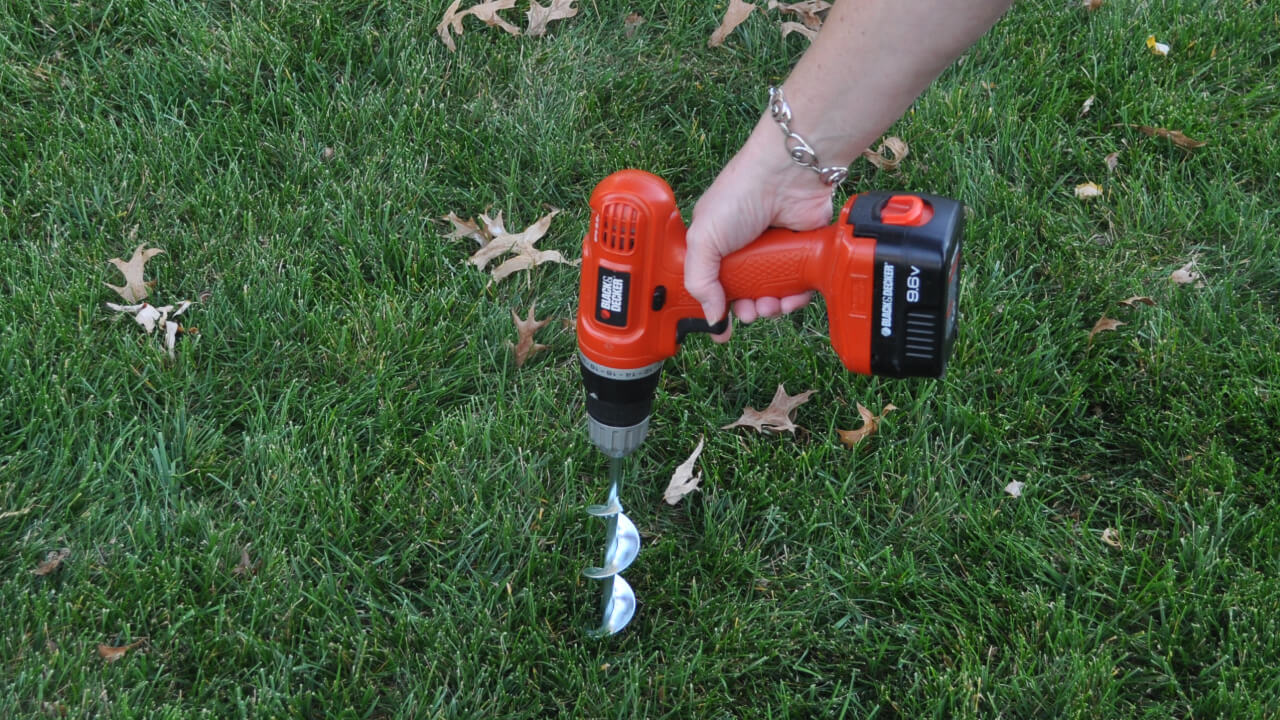
How to Plant Spring Blooming Bulbs
Bulb-planting tools are great for planting bulbs one at a time, but if clumps and mass plantings are part of the plan, then a trowel or shovel allows for digging trenches or large holes. Bulb planting is easiest if you dig one large hole rather than numerous small ones.
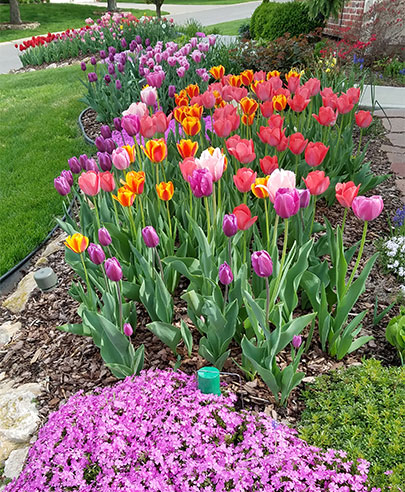
Creative planting will yield eye-catching results in the spring. Consider curving trenches, planting bulbs in layers, mixing bold colors such as red and yellow tulips, or planting different bulbs in mixed clumps. Pay close attention to the depth requirements of different bulbs. A rule of thumb is to plant four times deeper than the bulb diameter.
Once planted, give bulbs a thorough watering since bulbs are often 6 inches or deeper. A deep watering ensures they actually get the moisture. If the fall season turns out to be particularly dry, you may need to provide additional watering so the soil doesn’t dry out before it freezes. Adding 2 inches of mulch over the soils will help retain moisture and moderate soil temperatures.
Uncle’s Tip – Which End Is Up?
Plant with the pointed end towards the surface. Often you’ll have a flat bottom and roots to help you out. A few bulbs make it difficult to tell top from bottom, if all else fails, you can plant the bulb sideways and you’ll still get normal growth.
Troubleshooting Spring Bulbs
Deer and rodents can provide challenging growing conditions. Look for bulbs that don’t attract the pest you’re having trouble with. For example, while deer love tulips, they aren’t likely to eat daffodils. Fritillaria imperalis (skunk lilly) is known for emitting an odor that repels rodents.
If you’ve had trouble with no-show bulbs in their first year, it may be due to animals digging them up, bulb rot or bulbs planted too late or too shallow.
While first-year bulbs are known for flowering in most conditions, repeat performances may prove troublesome in shady areas or if the foliage gets removed from the plant before it yellows. But, if you follow the guidelines here, pay attention to variety requirements for the bulbs you purchase and give them the right place to grow, your spring will be blooming for sure.
Bagged Mulch and Bulk Mulch
What is Mulch?
Mulch is a material that covers the soil, usually in flower and landscape beds, to help control weeds and insulate plants. A stroll through the woods will reveal that mother nature mulches all her plants with a thick layer of fallen leaf litter and debris. To mimic mother nature in our landscapes we apply a layer of mulch over the soil. It can also add visual appeal to your garden by making the ground look consistent and well maintained.
What Are the Benefits of Mulch?
Mulch has many benefits for your garden area. It helps retain moisture in the soil; mulch adds organic matter breaking down over time, adding beneficial nutrients back into the soil. Mulch reduces winter injury by insulating the plants and helps with weed suppression.
Types of Mulch Available at the Grass Pad
Choosing the right mulch for your garden depends on personal preference and how you’d like the finished bed to look. Each of our Grass Pad locations offers mulch in bags and in bulk, although the options and inventory will vary by store. It’s best to call your nearest Grass Pad and see what options are available.
Grass Pad Locations Sell the Following Bagged Mulch Options:
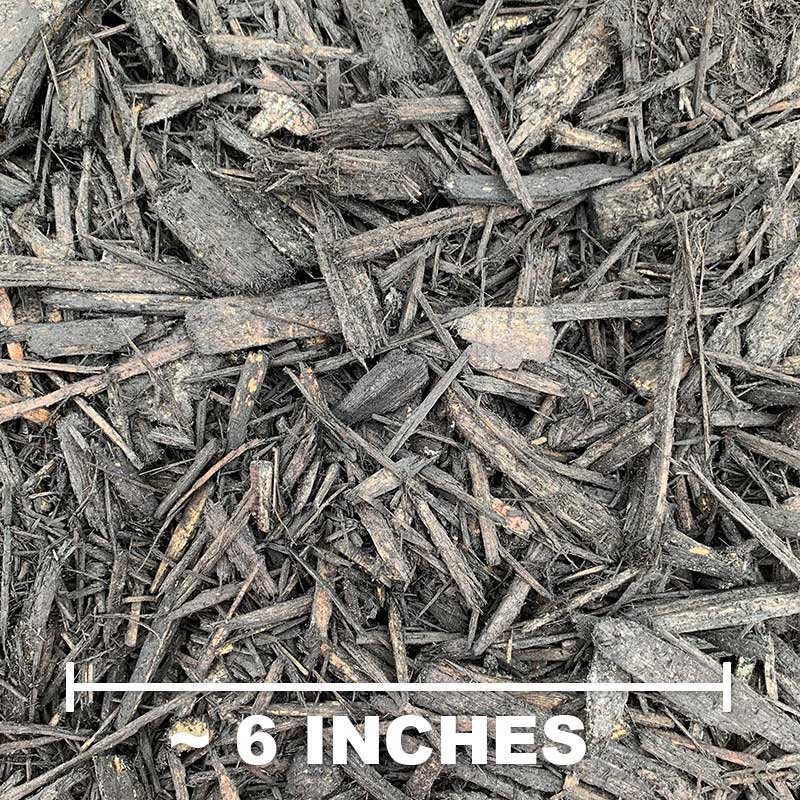
Black Dyed Mulch
2 cu ft Bag
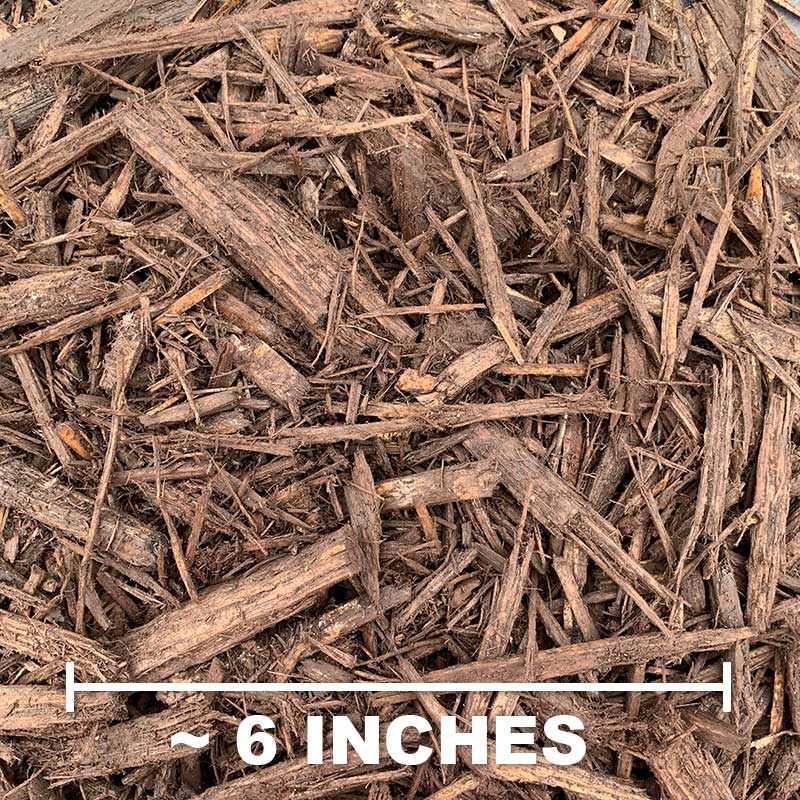
Brown Dyed Mulch
2 cu ft Bag
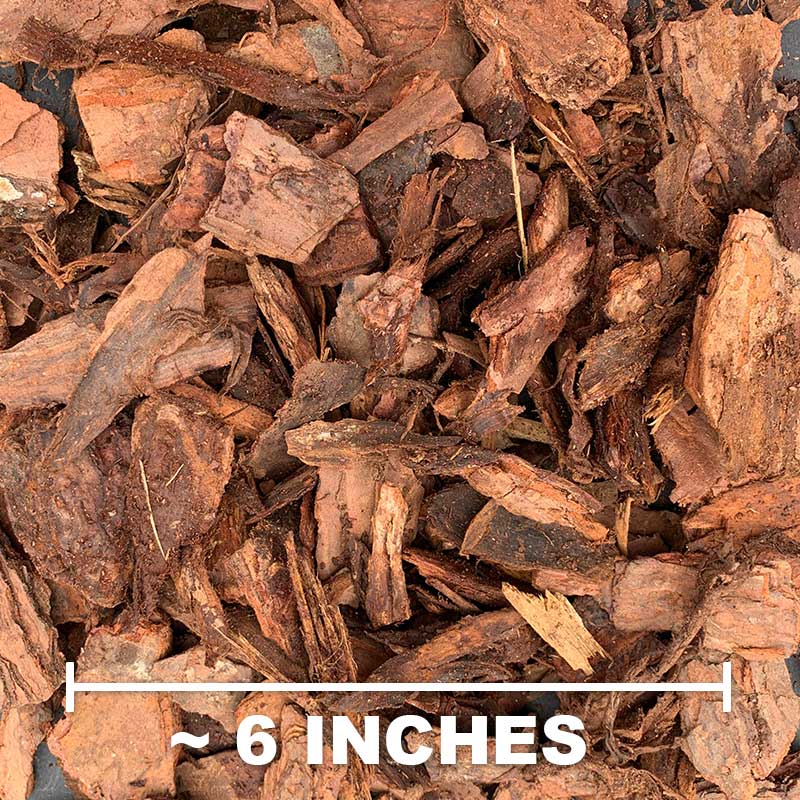
Pine Bark Mulch
3 cu ft Bag
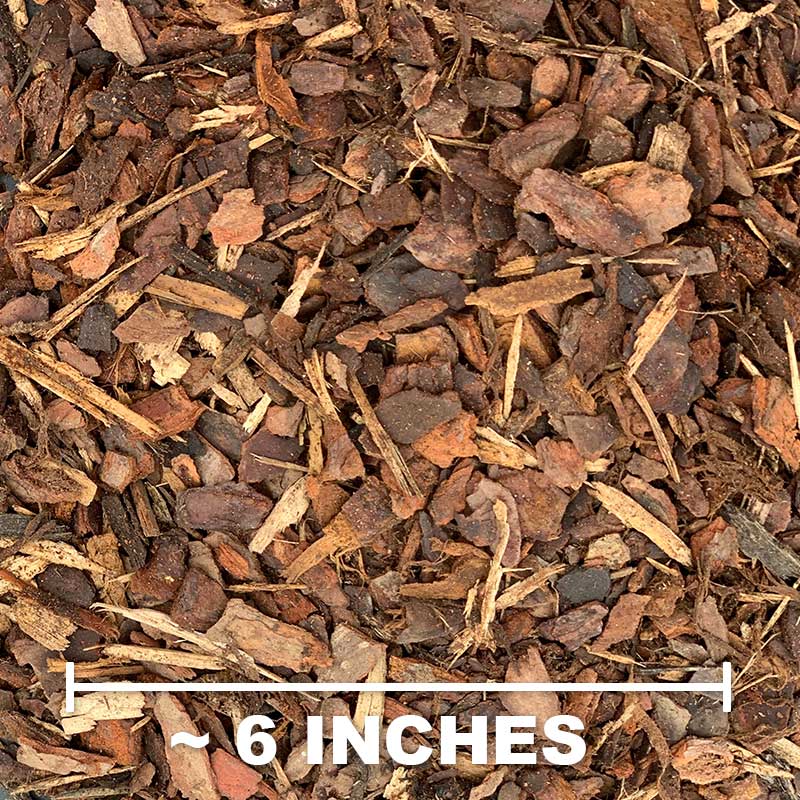
Pine Bark Mini Nuggets
3 cu ft Bag
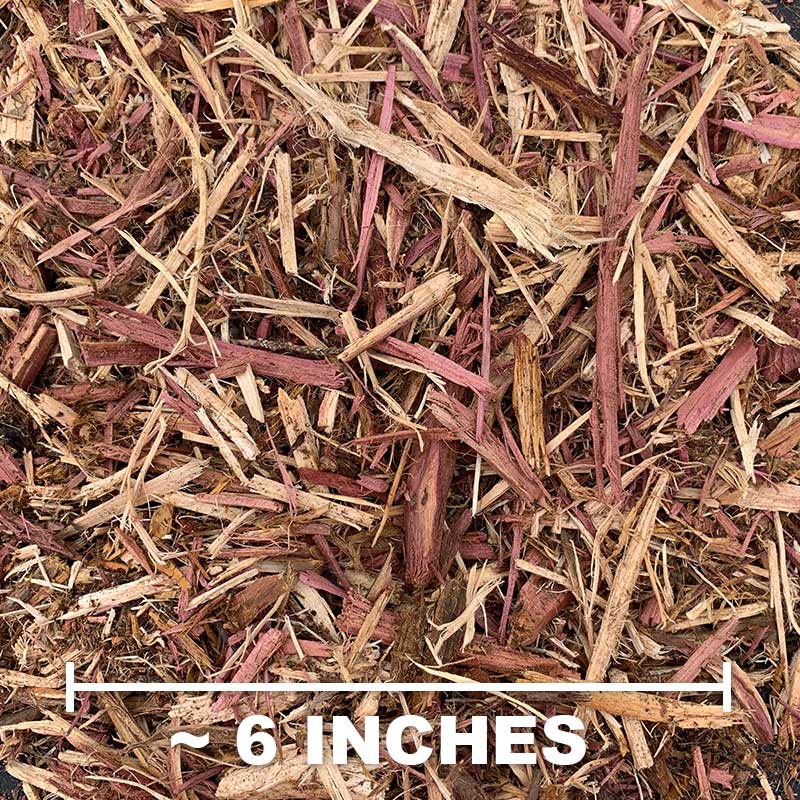
Cedar Mulch
2 cu ft Bag
Cypress Mulch
2 cu ft Bag
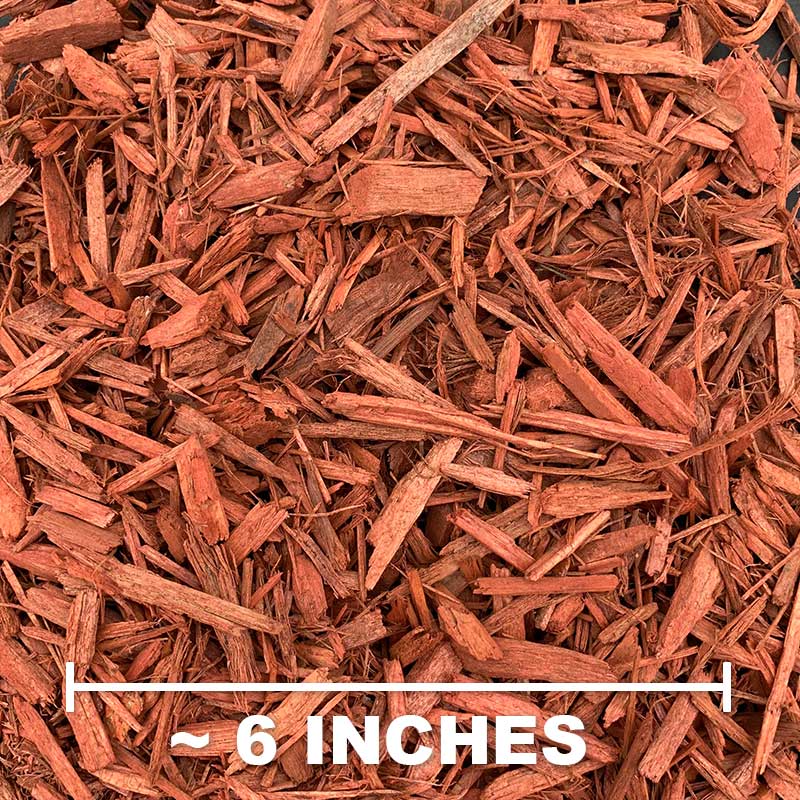
Red Mulch
2 cu ft Bag
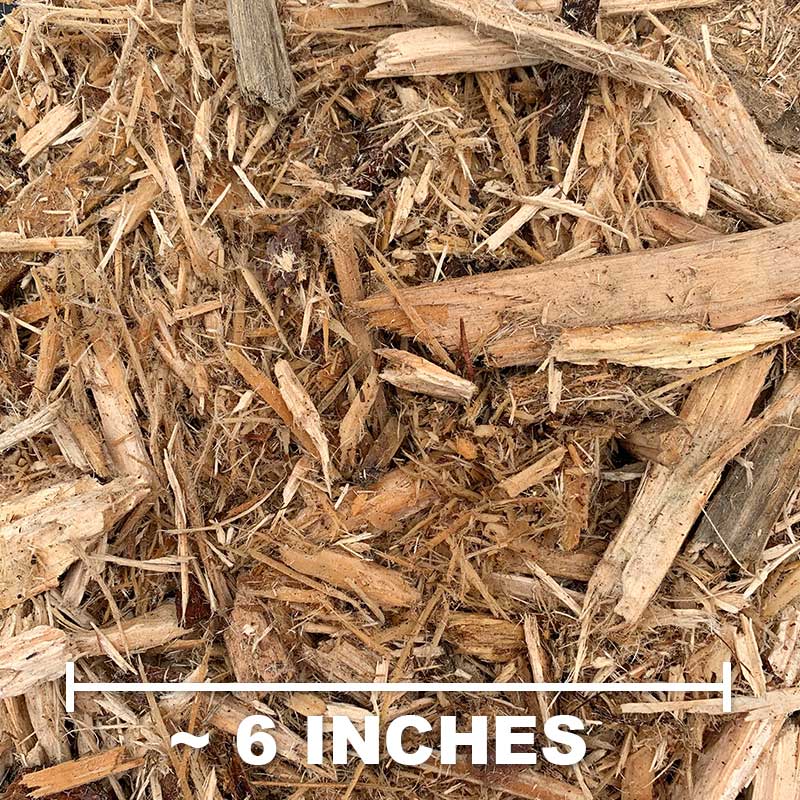
Hardwood Mulch
2 cu ft Bag
Bulk Mulch for Sale at the Grass Pad
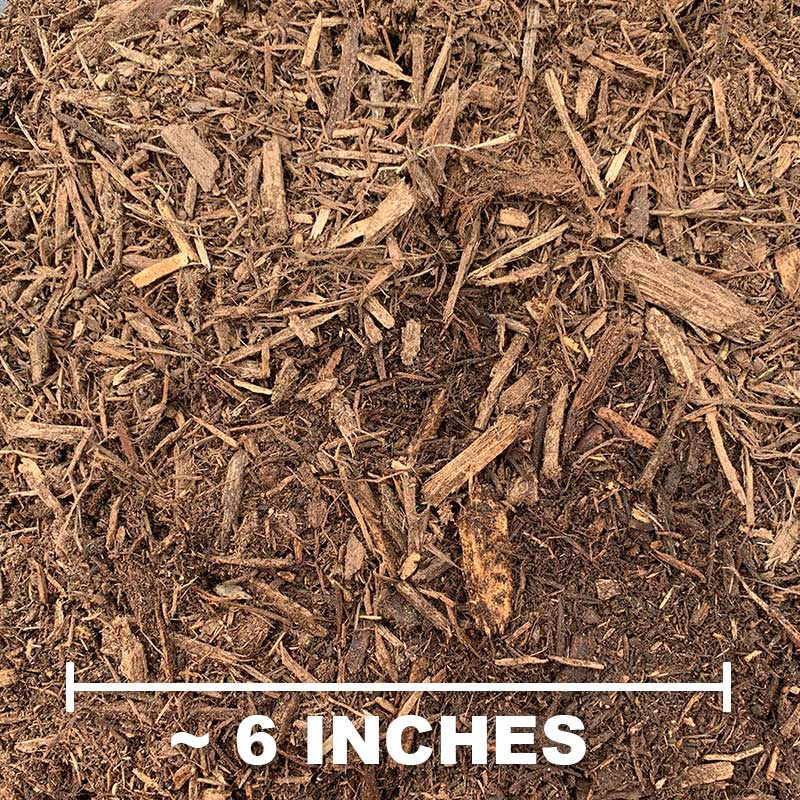
Each store location has bulk mulch that can be loaded into a trailer or a truck by one of our staff members. We offer bulk mulch in two varieties – Espresso Mulch (dark brown, dyed mulch) and Premium Chipped Mulch (brown chipped mulch). These are both sold by the cubic yard and can be purchased at the point of sale. Be sure to call your local store for availability. We are happy to load our bulk mulch by the bucket full into your truck or trailer, currently our delivery options are for bagged mulch only.
How to Mulch Your Trees and Shrubs
After planting new plants, or when refreshing the mulch every year, ensure that the mulch stays at least 3-4 inches from the trunk of the plant. Mulching keeps the sun and wind from drying out the top of the root ball and also helps prevent weeds and grass from growing on top of the root ball. To keep the mulch from spilling over into the lawn or other area, it’s best to dig an edge or use a piece of metal or vinyl edging.
Uncle’s Tip: Avoid the Mulch Volcano! The trunk tissue is not meant to have moisture held against it. Avoid having mulch piled against the trunk of the tree to avoid rotting or degradation of the bark.
How Much Mulch Do I Need?
That will depend on how deep you want the mulch and the square footage of the mulched area. The most common bag sizes for mulch are a 2 cubic foot and 3 cubic foot bags. The bulk mulch will be sold by the cubic yard. Use the tables below to determine how many cubic feet you’ll need to cover your mulch area.
2 Cubic Foot Bag
| Depth | Coverage |
| 2″ | 12 Square Feet |
| 3″ | 8 Square Feet |
| 4″ | 6 Square Feet |
3 Cubic Foot Bag
| Depth | Coverage |
| 2″ | 18 Square Feet |
| 3″ | 12 Square Feet |
| 4″ | 9 Square Feet |
1 Cubic Yard
| Depth | Coverage |
| 2″ | 162 Square Feet |
| 3″ | 108 Square Feet |
| 4″ | 81 Square Feet |
More Related Articles for Mulch:
Uncle’s Root Accelerator – Keeping Plants Healthy
- Uncle’s Root Accelerator gives plants a healthy start. Learn More at this Link
Uncle’s Max Mix – The Secret is in the Soil
- Uncle’s Max Mix is a premium-grade horticultural planting mix. Learn More at this Link
Grass Pad Nursery Stock
- Search Idiot-Proof plant selections available at Grass Pad. Learn more at this link.
How to Fertilize for Healthy Trees and Shrubs
- Tips for fertilizing new and existing shrubs in landscapes. Learn more at this link.
Guide to Planting Trees and Shrubs
- How to plant trees and shrubs for best results. Learn more at this link.
Flower Pots for Sale at the Grass Pad
Plant Pots at the Grass Pad
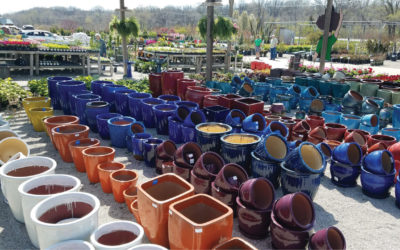
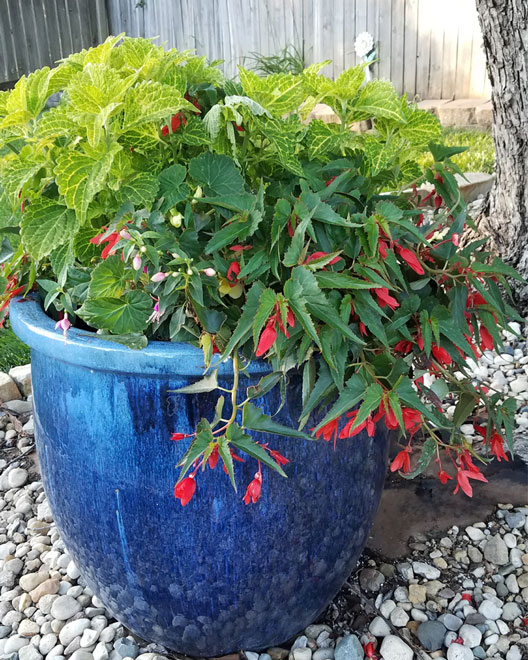
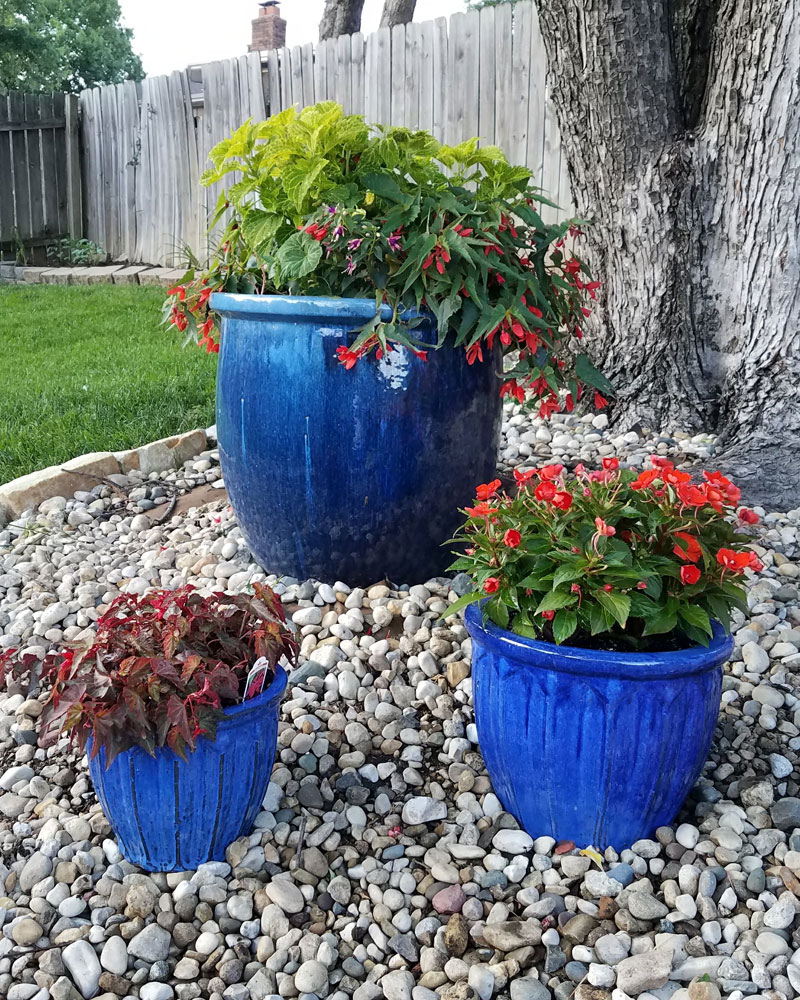
Whether you need a small pot for a window sill, or want to have a large container garden on your patio, the Grass Pad has what you need! Not only do we have many different sizes of pottery, our pottery comes from a variety of locations, from Vietnam to Germany. Each pot has its pros and cons – some are durable and more expensive, others are cost effective but not as weather tolerant. We’ve broken them out below by country of origin and provided some details so you can find the perfect pot for your needs!
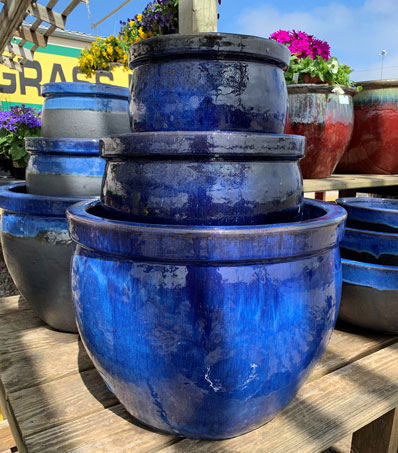
Vietnamese Pottery – Uncle’s Pick
Vietnamese pottery is the highest quality pottery that we sell at the Grass Pad. The clay the pots are made from is very strong and winter proof, making them a great choice if you don’t want to lug big pots around before the cold months. Vietnamese pots come in very large sizes, making them excellent statement pieces. Generally not mass-produced, the pottery you’re buying has a one of a kind look and there will be more variation in color even within the same set. As the pottery is made from dense clay, some of the pots can be heavy. If you’re looking for high quality pots, unique designs and the ability to leave them outside during the winter, look no further than Vietnamese pottery.
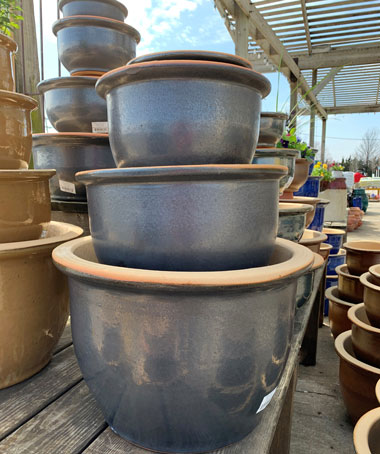
Malaysian Pottery
Moderate sizes, styles and colors are a hallmark of the Malaysian pottery. These pieces generally have more of a uniform appearance and less of a hand made look. They are great for expanding your collection especially for smaller plants you want to bring inside.
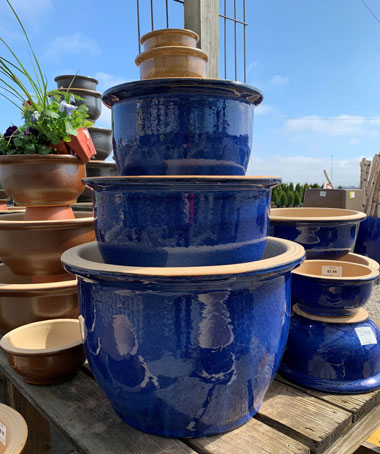
Chinese Pottery
Chinese Pottery offers a lot of variety both in size and glaze colors. Flashy colors with “drip” glazes are available in this category. You can select from everything from large statement pieces to window-sill size containers. While some of the clay may be able to handle winters outside, we feel our customers are safer protecting their investment by enjoying these planters indoors during the winter months.
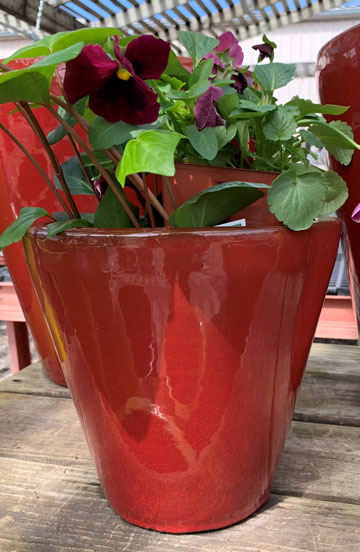
German Pottery
The planters we see from Germany are fun, ultra bright colors. This is achieved with an epoxy coating that is especially durable when protected freezing. These great colors make it a great welcome sign on porches and decks. Matching saucers are available when you are ready to bring these indoors.

Pot Feet and Saucers
Plants don’t like to have wet feet and neither do pots. Pot feet are designed to lift pots off the ground or deck to allow better drainage. They also allow for air flow beneath the planter so your deck can dry out and won’t get the “ring”. Not having standing water beneath the pot, preventing a mosquito hatchery from forming.
How to Winter Planters Outside
Planters left outside can get a helping hand from their human friends by ensuring good drainage. Avoiding water build-up inside the pot that can expand when freezing is a must. When initially planting the container, Grass Pad recommends the bottom 1/3 of the planter be drainage material. The easiest to use is lava rock for its light weight and air space. Water has a place to go.
Winter Preparations for Spring Lawn Domination
Preparing for Winter Dormancy
When the sun is shining on a mild winter’s day, many of us are looking out our windows and asking ourselves, “Is there anything I should be doing to my lawn?” Besides checking Craiglist and Facebook Marketplace for good deals on lawn equipment, there is not much you need to do. However, if you have a busy lifestyle and have just not had the time to get all your lawn preparations checked off, a sunny, mild day in winter is a great time to complete them. Here are a few reminders for the next break in the weather.
Get Fall Wrapped Up
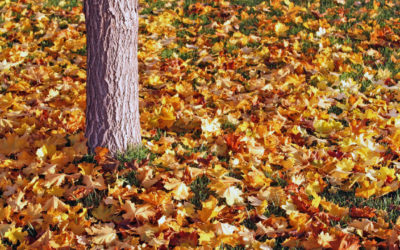
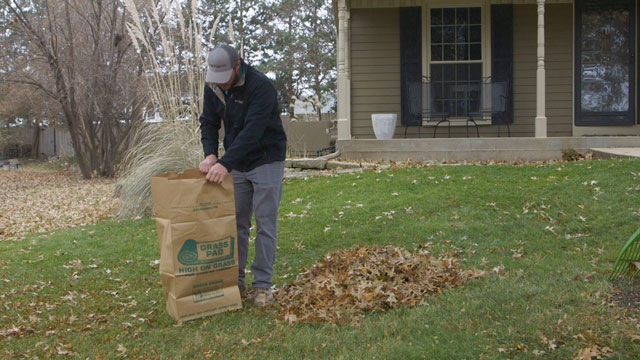
It’s time to get those last few leaves composted, mulched, or removed from the lawn before the snow season arrives. Heavy piles of unmulched leaves block sunlight, air movement, and moisture in the soil. A thin layer of mulched leaves is good, but it must be thin enough to allow the sun, air, and water to reach the grass.
Winter Food for Lawns
Mulched leaves are beneficial but won’t supply enough nutrients for healthy turf. Apply Snowman, winter root builder, on a day when the ground is not frozen. Snowman winter root builder is low nitrogen with added phosphorous and potash for root growth and disease resistance. Grass roots will continue to grow till the soil is frozen hard.
Lawn-Cal for Winter Lawns
Salt from ice melter used on roads, driveways, and sidewalks can cause severe damage to grass, trees, and small shrubs. Now is the time to apply Grass Pad’s Lawn Cal, which contains beneficial lawn calcium. Calcium will play a physiological role in recovering sodic soil and improving the soil structure to allow sodium to leach from the soil.
Preparing Trees and Shrubs for Winter
Prune or cut off any dead growth from trees and shrubs to discourage insects who choose to hide there for the winter. Remove branches that overlap and rub against each other.
Avoid pruning spring flowering shrubs such as lilac, azalea, and specific hydrangea. These shrubs form their spring flower buds over late summer and fall. Any pruning of these shrubs, though not life-threatening, will be removing spring flowers. Prune spring flowering shrubs after the bloom petals have fallen next spring.
Dormant oil can be applied on a mild day above 40 degrees. Use over a burning bush, euonymous, pines, or spruce to control scale and other insect eggs, such as spider mites.
Protect young trees from animals by wrapping stems or trunks with wire mesh. Smooth bark trees such as Red maples should be protected with tree wrap to prevent winter sun scalding.
Preparing Perennial Gardens for Winter
Cut back dry stems to soil level to prevent rotting in flower beds.
Procrastinators, if you have not planted your tulips, daffodils, crocus, and hyacinth, get them into the ground soon. The ground is still workable now, but it won’t be long before we have a frozen tundra.
Mulch flower beds once extreme cold weather arrives. Adding a fresh layer of mulch around plantings will give the landscape a neat appearance while keeping the temperatures around the plants consistent. Mulch will hold moisture in the soil, one of the most important parts of fighting winter stress.
Garden Tools Need Attention
Oil garden hand tools to extend their life. A thin layer of vegetable oil will help to protect your shovels, spades, axes, and hoes from moisture and winter rust. Extend the life of your garden hoses by storing them in the shed, garage, or basement.
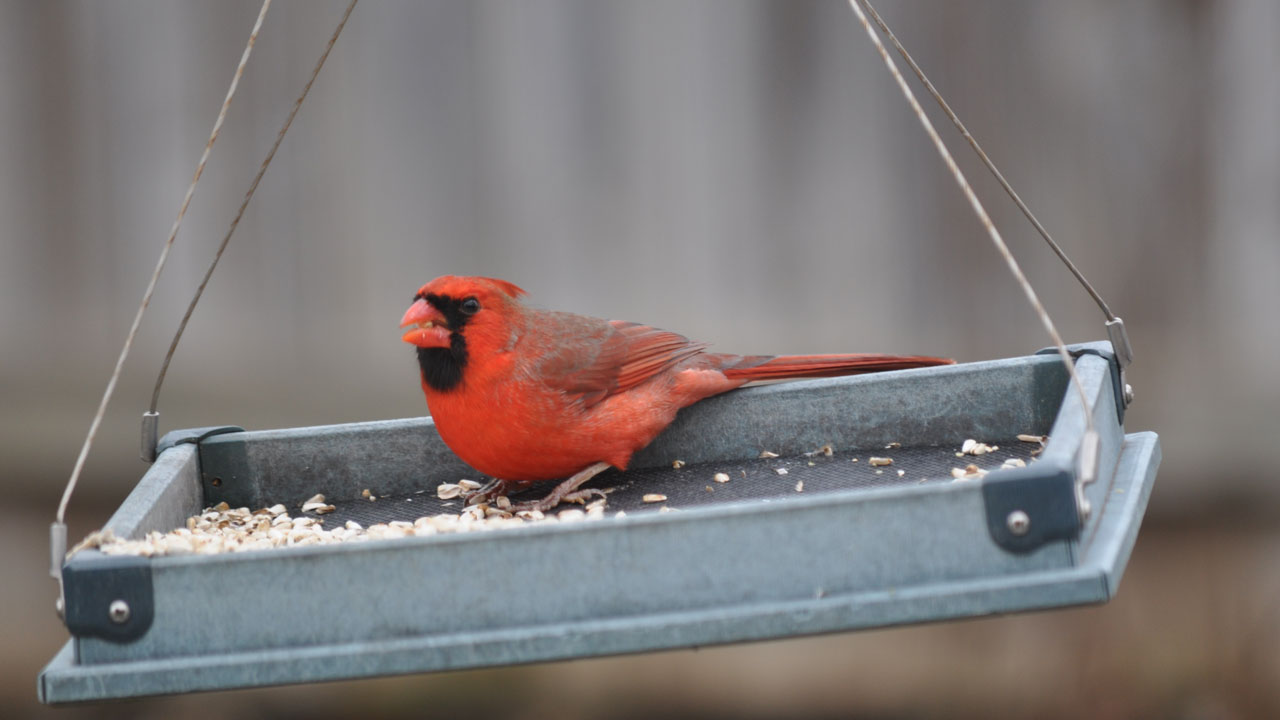
Feeders for the Birds
- Clean bird feeders each season.
- Bird houses provide shelter from the weather and a haven from cats and other predators.
- As temperatures fall, high fat, high-calorie suet is the perfect food to help birds get through long cold nights.
- Keep a low level of fresh water in a clean bird bath. A bird bath heater will keep the water from freezing.
See Related: Bird Feeders and Bird Seed

Dry Winter? Pull The Hoses Back Out!
If late fall & winter have been extremely dry, that means your grass (and your landscape!) is thirsty, so get that hose back out and start watering. Deep watering help the roots of your grass and your plants establish better before the long winter, so find a couple of these warm, sunny days and get some water down.
More Related Articles to Summer Lawn Survival
What is Dormant Seeding?
- The benefits of dormant seeding. Learn More at this Link
Snowman – Key to Lawn Domination
- Why Snowman is essential for a healthy lawn. Learn More at this Link
Bird Feeders & Bird Seed
- What type of bird feeder do you need for your backyard? Learn More at this Link
When to Prune a Hydrangea
- Different hydrangeas require different pruning times. Learn More at this Link
Benefits of adding Calcium to Your Lawns Diet
- Adding calcium to your lawn has many benefits for a healthy lawn. Learn More at this Link

Tulips
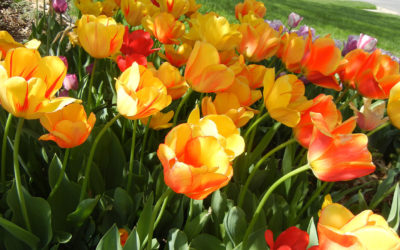
Tulips Tulips Tulips
Chosen as the most Fantastic Spring Flowering Bulb tulips continue to be the most popular with our customers. Valued for their flowers, tulips are deeply rooted into the Dutch culture. At one time, the entire Dutch economy was built upon the tulip. Originally from Turkey, tulips were brought to Eastern Europe in the 16th century, and have now become one of the world’s most admired flowers.
See Related: Planting Spring Bulbs

Triumph Tulips
Triumph tulips are the most popular of all varieties. With its traditional shape tulip bloom, Triumph tulips are available in almost any color imaginable. Grown on a sturdy stem, Triumph makes an attractive garden flower as well as a fresh cut flower with a very long vase life.

Darwin Tulips
Darwin hybrid tulips have the tallest and largest blooms and make an excellent choice for the home garden. Most Darwin hybrids are early season bloomers. An interesting side note, Darwin blooms have a habit of closing during cooler nights and opening with the warming sun.

Emperor Tulips
Fosteriana tulips, known as Emperor tulips, are an excellent choice to fill your flower beds with a full season of color. With a uniquely shaped wide and long flower, Fosteriana tulips grow medium to tall. Emperor tulips are most impressive when planted in masses.

Greigii Tulips
Greigii tulips bring the most fun to the garden spaces and planters. With variegated stems and shorter in stature, Greigii tulips pop with a massive flower bloom. The striped stems with purple streaks give flower beds and containers a little extra pizazz in early spring. Excellent choice for rock gardens, borders and containers.
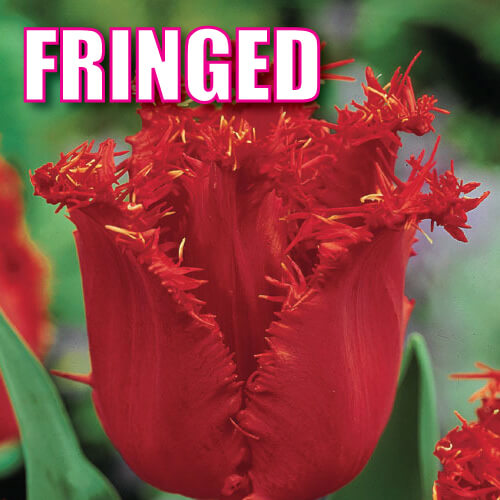
Fringed Tulips
Fringed tulips are the “shock and awe” of the tulip garden. One look at these distinctively shaped blooms and folks will be turning their heads. For an extended bloom life, plant fringed tulips in protected or covered areas. The flowers tend to hold water inside the petal and can shorten the bloom time.
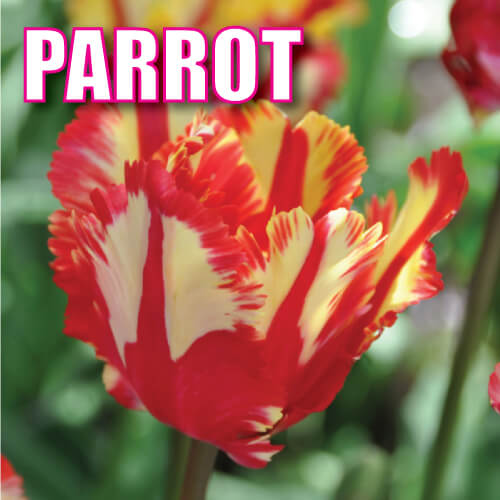
Parrot Tulips
Parrot Tulips have a ruffled and feather like texture resembling the wings of a parrot. Parrot tulips are the most outrageous of all tulip varieties. Most Parrot tulips are late season bloomers. The blooms tend to open with more sunlight and sometimes change colors as the flower matures. Their unique flower shape can make them susceptible to the wind and heavy rain damage, so it is best to plant in a protected area.
Related Articles to Tulips
Uncle’s Root Accelerator – Keeping Plants Healthy
- Uncle’s Root Accelerator gives plants a healthy start. Learn More at this Link
Uncle’s Max Mix – The Secret is in the Soil
- Uncle’s Max Mix is a premium-grade horticultural planting mix. Learn More at this Link
Fantastic Five Spring Flowering Bulbs
- Five great ideas for Idiot-Proof Spring flowering bulbs. Learn More at this Link.
Grass Pad Nursery Stock
- Search Idiot-Proof plant selections available at Grass Pad. Learn more at this link.

Fantastic Five Spring Flowering Bulbs
Colorful masses of eye-catching spring bulbs are an easy cure for those winter doldrums. Bulbs planted in fall make dazzling beds of bright neon colors blooming from February to May. Now is the time to get to the Grass Pad for the best selection. Dutch bulbs shipped straight from Sassenheim to Grass Pad Warehouses have arrived. Dutch Uncle has been buying bulbs from Holland for over 50 years. Uncle knows a Dutch Deal and these are his picks for the Fantastic Five Spring Flowering Bulbs to plant in the mid-west.
See Related: How to Plant Spring Bulbs
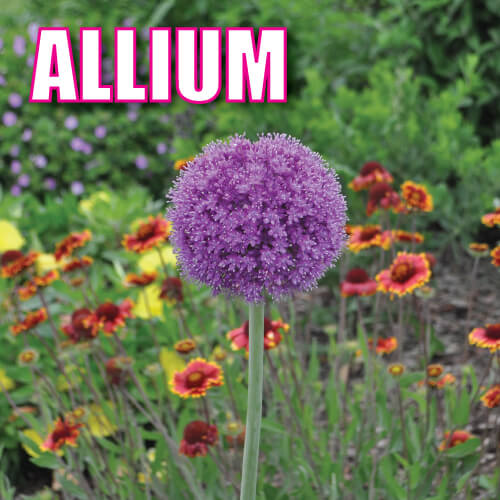
No. 5 Allium Bulbs
Allium belong to the ornamental onion family. However, these will not be on the dinner plate. These idiot proof bulbs are some of the most distinctive fall planted bulbs adding height and texture to spring gardens. Hardy through most of the mid-west climate, allium tolerate drought and poor soil conditions. Available in a variety of heights, colors, and blooms, allium, with their lollipop look are a fun and whimsical flower to have in the garden.
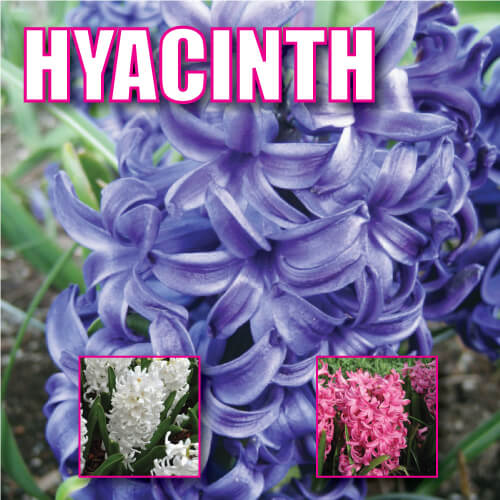
No 4. Hyacinth
Charming bloom with a fragrance and aroma that will compare to finest French perfumes make hyacinths a Fantastic Spring Flowering Bulb. Hyacinth can be planted by themselves or as a feature in beds mixed with tulips and daffodils. Blooming early to mid-spring. Easily adapting to the mid-west environment, hyacinth has shown to be deer and rodent resistant. A single flower will appear from each bulb along with glossy green leaves. Hyacinth makes an excellent cut flower for color and fragrance. Hyacinth bulbs can be pre-chilled, or forced, for indoor color during winter months.
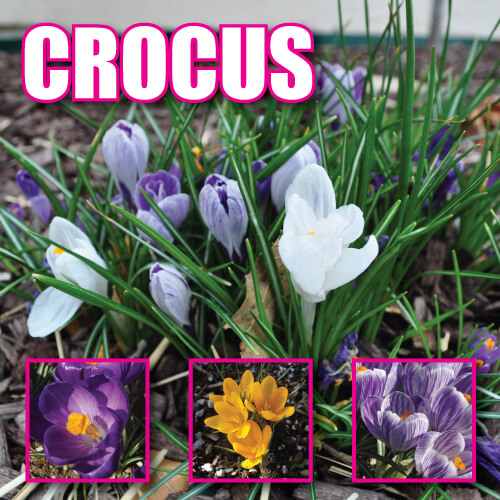
No. 3 Crocus
The first flowers to sprout from the earth each spring, crocus bring forth hope for the warmer days and bright blooms of spring. Crocus bulbs must be planted during the autumn months to bloom during the spring. A true perennial, they naturalize well, multiply very quickly, can be planted nearly anywhere, and require little care from one year to the next. They also tend to be highly resistant to deer. Crocus will be flowered and gone by the time daffodils, hyacinths, and tulips begin to color – their addition is an excellent way to extend the bloom season in a garden.
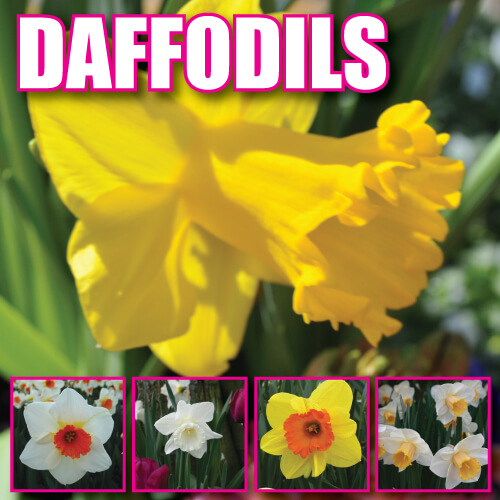
No. 2 Daffodils
Daffodils are the idiot proof bulb demanding the least effort for the highest reward. Undoubtedly one of the most recognized flowers, daffodils are extremely hardy and easily naturalize here in the mid-west. Daffodils must be planted in late fall to grow and bloom with their trumpet-shaped flowers, heralding the announcement of the spring. Most often spotted blooming in varieties of yellow, daffodils are available in a few other colors and bi-colored combinations. Inspiring when planted in clusters, daffodils make an excellent cut flower. One bulb can grow many stems and have one bloom on each. Available in various heights, colors and bloom times, daffodil will stay in color for many weeks.
Uncle’s tip: Daffodils are one of the few garden flowers resistant to deer and rodents.
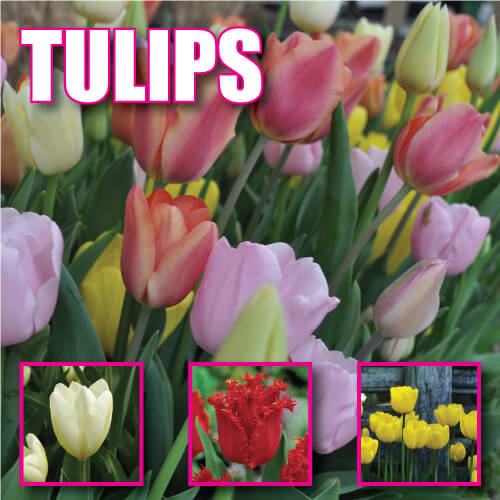
No. 1 Tulips
The most fantastic flowering bulb is the tulip. Prized for the flowers, tulips are deeply rooted in the Dutch culture and economy. Stunningly beautiful when clustered into large garden spaces and containers, tulips are the superstar of any flower bed or container. When complimented with crocus, daffodil or hyacinth tulips will make brilliant spring color combinations. The rainbow of colors available in tulips alone is unmatched. A mixture of early, mid and late season bloom times allows tulips to create color beds and containers for an extended period in spring.
See Related: Types of Tulips
More Related Articles to Tulips:
Uncle’s Root Accelerator – Keeping Plants Healthy
- Uncle’s Root Accelerator gives plants a healthy start. Learn More at this Link
Uncle’s Max Mix – The Secret is in the Soil
- Uncle’s Max Mix is a premium-grade horticultural planting mix. Learn More at this Link
Types of Tulips
- Early, Mid, and Late Season blooming tulips. Darwin, Emperor, Parrot types and more. Learn More at this link
Grass Pad Nursery Stock
- Search Idiot-Proof plant selections available at Grass Pad. Learn more at this link.
How to Fertilize for Healthy Trees and Shrubs
- Tips for fertilizing new and existing shrubs in landscapes. Learn more at this link.

Fertilize for Healthy Trees and Shrubs
Feed Trees and Shrubs
Fertilizing trees and shrubs is a necessity, and that includes fruit trees. One of the most significant benefits of fertilizing trees is the preventative maintenance they provide. Landscape shrubs and trees require sufficient energy stores to remain healthy to survive insect and environmental stress. Trees and shrubs are a valuable part of your property, and it is essential to protect your investment. Established trees and shrubs can be easily fed by homeowners using tree food spikes or granular tree food applications. For best results, provide your trees twice yearly, once in early spring and once mid-fall.
What are Tree Food Spikes?
Tree food spikes are the easiest method for feeding established trees. Tree food spikes are compressed cylinders of slow-release fertilizers. Gradually dissolving, tree spikes release nutrients evenly throughout the season. A mallet or hammer can drive These compressed spikes into the ground. In a dry season, using an auger attachment for a drill makes installation more convenient. Once the quantity of tree spikes needed has been determined, drive the spikes into the soil, spacing them evenly near the tree’s drip line. The drip line is the imaginary ring on the ground directly below the outer circumference of the tree’s branches. For small trees and shrubs requiring only one or two spikes, break spikes in half to allow for a uniform distribution pattern.

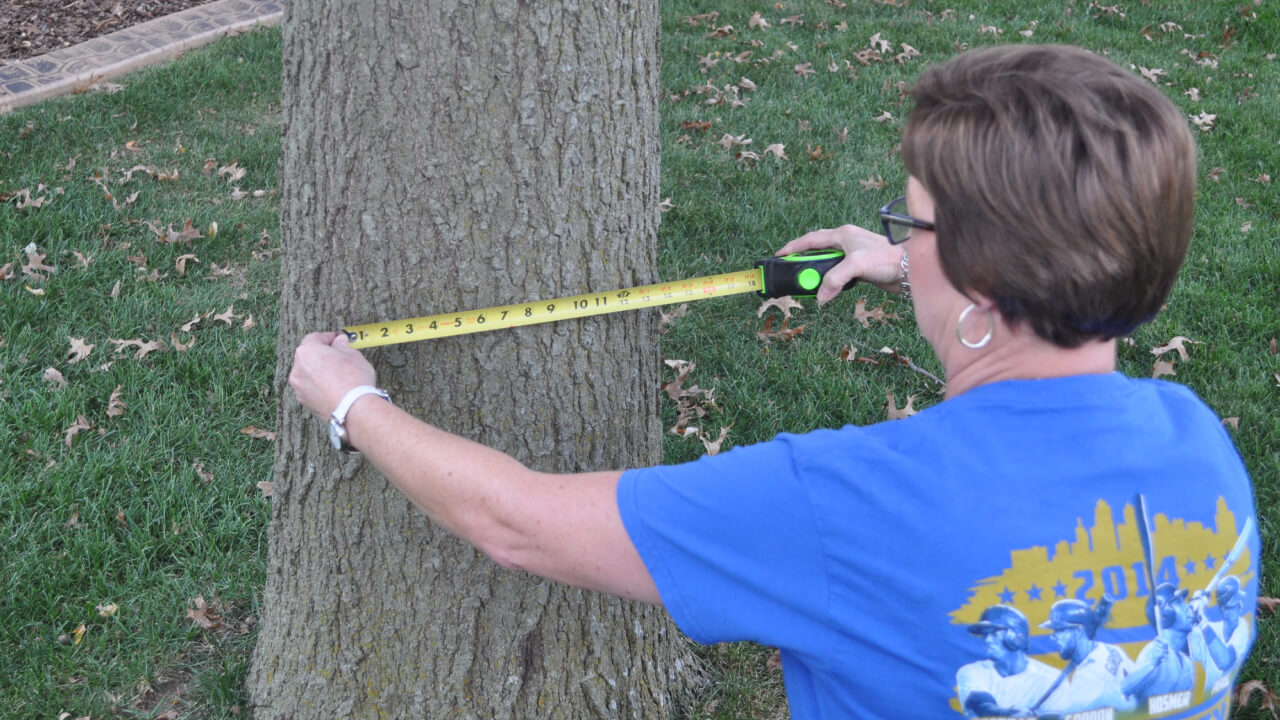
How Many Tree Food Spikes?
Measure your tree trunk diameter 18 inches from the ground for the most accurate measurement. Bring your tree measurements to the Grass Pad, and our Green Team can help you determine how many spikes or tablets are required for your landscape. Fertilizer formulas are available for evergreen, shade, ornamental, and fruit trees. Also, there are formulas fortified with iron for plants needing iron supplements, such as azaleas, rhododendrons, or chlorotic pin oaks.
Uncle’s Tip: Do not use tree food spikes on newly installed trees or shrubs. Spikes contain fertilizers in amounts not recommended for new trees or shrubs. Use Uncle’s Root Accelerator for the first 12 months for newly planted trees.

Granular Application Tree Food
Uncle’s Green Love is specifically suitable for trees such as oak that thrive with iron in their diet. Spread granulated tree food over the feeder root zone using a push or hand spreader, or use an auger to drill holes and fill. Green Love is a non-burning bio-solid fertilizer that slowly releases nutrients to feed trees and shrubs for up to ten weeks. Green Love contains a low nitrogen, slow-release fertilizer formula to enhance root establishment, disease resistance, and plant vigor. Use five pounds of Green Love per inch of trunk diameter for established trees.
Also available is Uncle’s Tree Food, a multi-purpose granule tree food. Uncle’s Tree Food is formulated to feed ornamental trees, shrubs, and large shade trees.
How to Fertilize Newly Planted Trees and Shrubs
If you are planting new landscapes, avoid using fertilizer spikes until the plant has been established for at least one year. New plantings require a unique fertilizer formulation to accelerate root development. Uncle’s Root Accelerator is intended for new plantings and is recommended for all trees and shrubs at installation. Applied once per month for the first year, Root Accelerator will ensure transplanting success. Uncle’s Root Accelerator is a liquid-concentrated plant starter fertilizer mixed with water and then poured around the tree’s base or shrub. The liquid is immediately available to the plant, encouraging healthy root growth.
See Related: Transplanting New Trees and Shrubs

More Related Articles on Tree Care
Pin Oaks Leaves are Yellow
- How to treat chlorotic Pin Oaks. Learn More at this Link
Max Mix Landscape Planting Mix
- Transplanting new plants and trees? Use Grass Pad’s Max Mix. Learn More at this Link
Controlling Emerald Ash Borer
- Preventing the spread of the EAP. Learn More at this Link
Fruit Tree Maintenance
- Tips on pollinators, battling disease, and insects on fruit trees. Learn More at this Link

Guide to Successful Tree and Shrub Planting
How to Plant Trees and Bushes
Start by finding the appropriate area for the tree or bush, paying attention to sun and water requirements. The key to success with any plant starts in the roots. Strong, healthy roots need good drainage, aeration and lots of organic matter to grow and thrive.
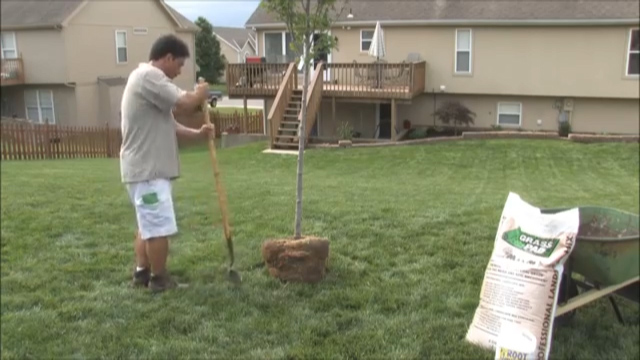
Step 1 – Dig the Hole Twice as Wide as the Pot
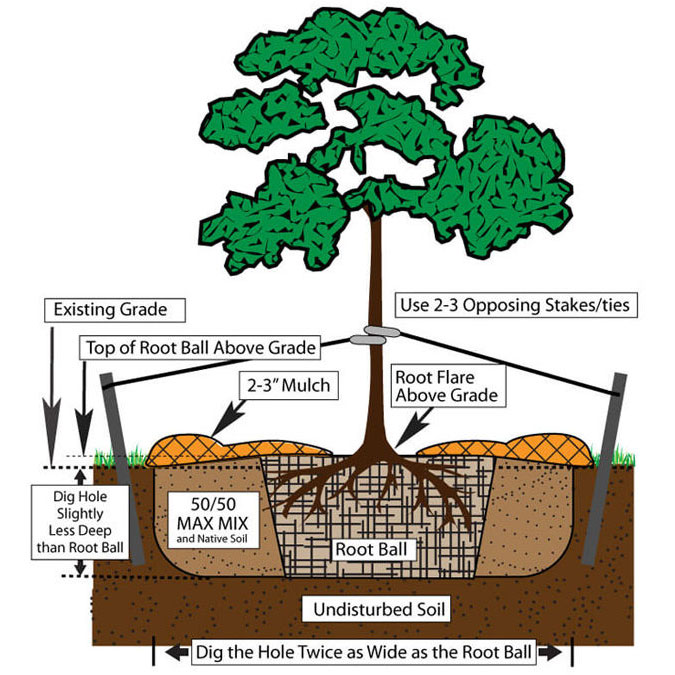
Dig the hole for the plant twice as wide as the container and not quite as deep as the container or root ball. When you remove the plant from the pot, the top of the soil on the root ball should be slightly above the grade of the surrounding earth. In heavy clay soil, we recommend that 25% of the root ball be above grade. Keep the soil nearby – you’ll need it to refill the hole. Remove the plant from the container and place into the new hole.
Step 2 – Remove the Plant from Its Container
Remove any twine, rope, straps, burlap or wire basket from around the root ball, being careful not to damage the bark. Using your hands gently loosen the roots from the root ball, and cut off any circling or matted roots. This allows the roots to start growing outward and downward into the soil. Plants become “root bound” in the pot, which means they are tightly twisted around each other. Loosening the roots is an essential step for plant growth. Make sure the root flare is visible above the existing grade (see image at top of page).


Step 3 – Backfill the Hole with Soil and Max Mix
Backfill the hole with a mixture of 50% native soil (the soil you dug out of the hole) and 50% Uncle’s Max Mix premium landscapers mix. Max Mix serves as a nutrient-rich growing medium, and blending it with the native soil gives the plant a transition zone where it can adjust to the native soil. Remove any air pockets while backfilling by tamping down with your foot periodically or by watering the hole incrementally as you fill it. The plant’s roots will not be able to grow through any air pockets that exist in the soil, so it is vital to remove them. Very little backfill should be on top of the root ball.
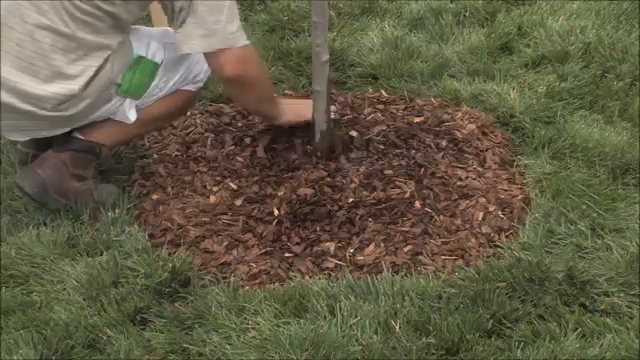
Step 4 – Cover the Plant Area with Mulch
Next, cover the newly planted tree or bush with mulch, ensuring that the mulch stays at least 3-4 inches from the trunk of the plant. Mulching keeps the sun and wind from drying out the top of the root ball and also helps prevent weeds and grass from growing on top of the root ball.
See Related: Types of Mulch
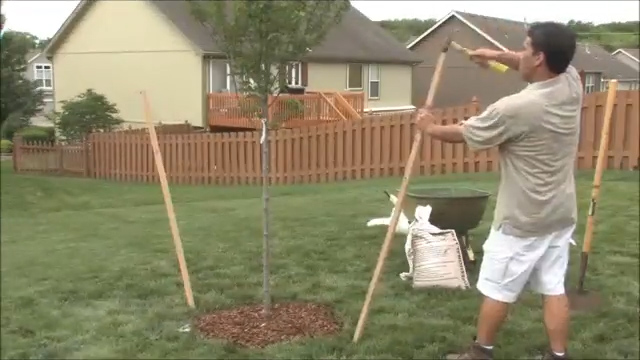
Step 5 – Stake the Tree
To give the new tree support, stake the tree to protect it from the prevailing winds, which in our part of the world come from the south. Drive the stakes into firm, undisturbed soil. Run the support wire through a protective tube or strap so that it doesn’t damage the tree. The tree should be tethered to the stakes with adequate tension to allow some free movement in all directions, while preventing it from falling over in heavy winds.. Remove all stakes, wires and straps after the first full growing season.
Step 6 – Water and Feed the Plant!
The final step is to fertilize and water the plant immediately after planting. Use Uncle’s Root Accelerator as a fertilizer for all newly planted plants. This fertilizer is designed to feed the root system of the plant, rather than promote top growth. The plant needs to develop a strong root system during the first year so that it can feed itself in the future.
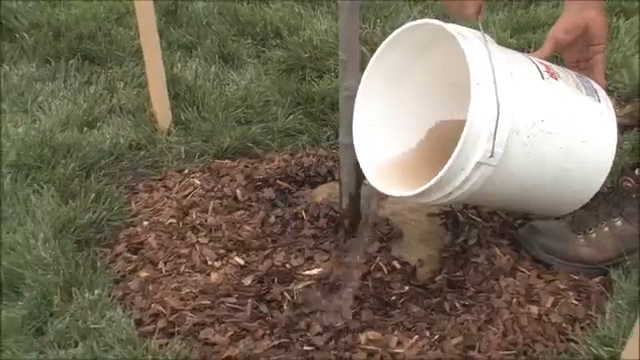
Watering will be essential for the success of the plant. We recommend the 3-2-1 approach to watering. Water deeply 3 times per week the first week, 2 times the second week and once a week thereafter. For example, if the root ball was in a five gallon container, watering deeply means putting at least five gallons of water on the plant each watering. Come in and ask our experts for more information about watering your new plants.
Root Accelerator Dilution Chart
| Pot Size / Caliber | Gal. of Water | oz. of Accelerator |
| #1 | 1 | 3 |
| #2 | 2 | 6 |
| #3/5 | 5 | 15 |
| #7 | 7 | 21 |
| #10-25 | 10 | 30 |
| 1.5" | 10 | 30 |
| 2"+ | 10 | 30 |