Nursery
Starting Garden Seeds Indoors
Grow Your Own Victory Garden
Growing your own garden can be economical, healthy, fun, and educational for the whole family, plus you get tomatoes! Gardening can be that break you need from the hustle and bustle of the workweek. Gardening can be the connection you were looking for to get your child away from the X-Box. Dropping a seed in some dirt can do miracles for your health, family, and your pocketbook.
In the beginning, you might feel overwhelmed by the plethora of gardening catalogs and websites, so it’s best to start by trial and error. Here are a few idiot-proof tips for starting seeds indoors that will boost the beginning gardener’s success rate and confidence.
As the season progresses, Grass Pad nurseries will have vegetable transplants available for those that don’t have the room around the house to start your plants. Grass Pad carries all the most common vegetables in many varieties – things like tomatoes, peppers, squash, eggplant, and all the types of herbs will be available in plant form. Date of availability will depend on weather, so call your local Grass Pad for more information on when to expect these plants.
Tools for Starting Garden Seeds
Getting started growing your own gardens is almost idiot proof. These are the all the tools you will need to get started:
- Garden seed packs
- Transplanting trays
- Seed starting pots
- Soil-less seed starting mix
- Watering can
- Labels
- Marking pen
Making Your Seed Selection
Begin by making your seed selections early, come to the Grass Pad and wander through the thousands of new and heirloom vegetable and flower seed packs. Feel free to bring mail-order catalogs along for ideas and compare prices. Things to ponder, how much area will you be planting? And do you have full sun or shade areas?
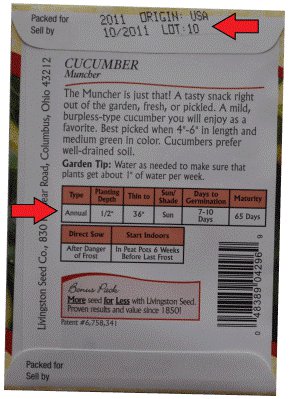
Don’t use old seeds. The older seeds become, the less likely they are to sprout. Always look on the back of the pack for the “sell-by date,” planting depth, spacing, sunlight, maturity dates, and gardening tips for each variety. At Grass Pad, we receive fresh shipments of flower and garden seed packs at the beginning of each season and continue to refresh our seed racks regularly throughout the seasons.
When to Move Seeds Outside
Seedlings can be transferred outdoors when the temperatures are warm enough to support them. If you start seeds too early, you may need to “shift up” – or move the baby plants to larger pots to allow for more root growth before moving them outside.
In our area the average date of last frost is Mother’s Day. Check the planting chart on the back of the seed packet for the seed starting date.
Hardening Seedlings Before Moving Outside
The transition from inside to outside can be one of the most difficult parts of starting seeds indoors. If the move is too abrupt it can cause problems with the plant. For best results, follow these tips:
- Start moving the plants outside during the day and bring them in each night.
- Begin the transition stage 1-2 weeks before permanently moving them outdoors.
- Place the plants outside in a shady spot during the day. Increase the amount of sun the plants receive gradually each day.
- Avoid windy days and cold weather during the hardening process.
- Slowly reduce the watering schedule of the plant, but don’t allow them to wilt.
Choosing Your Growing Pot
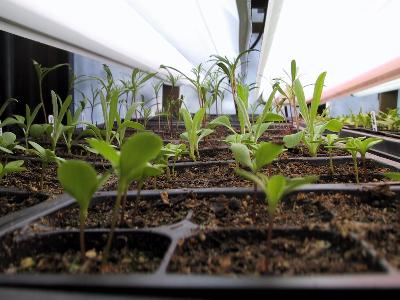
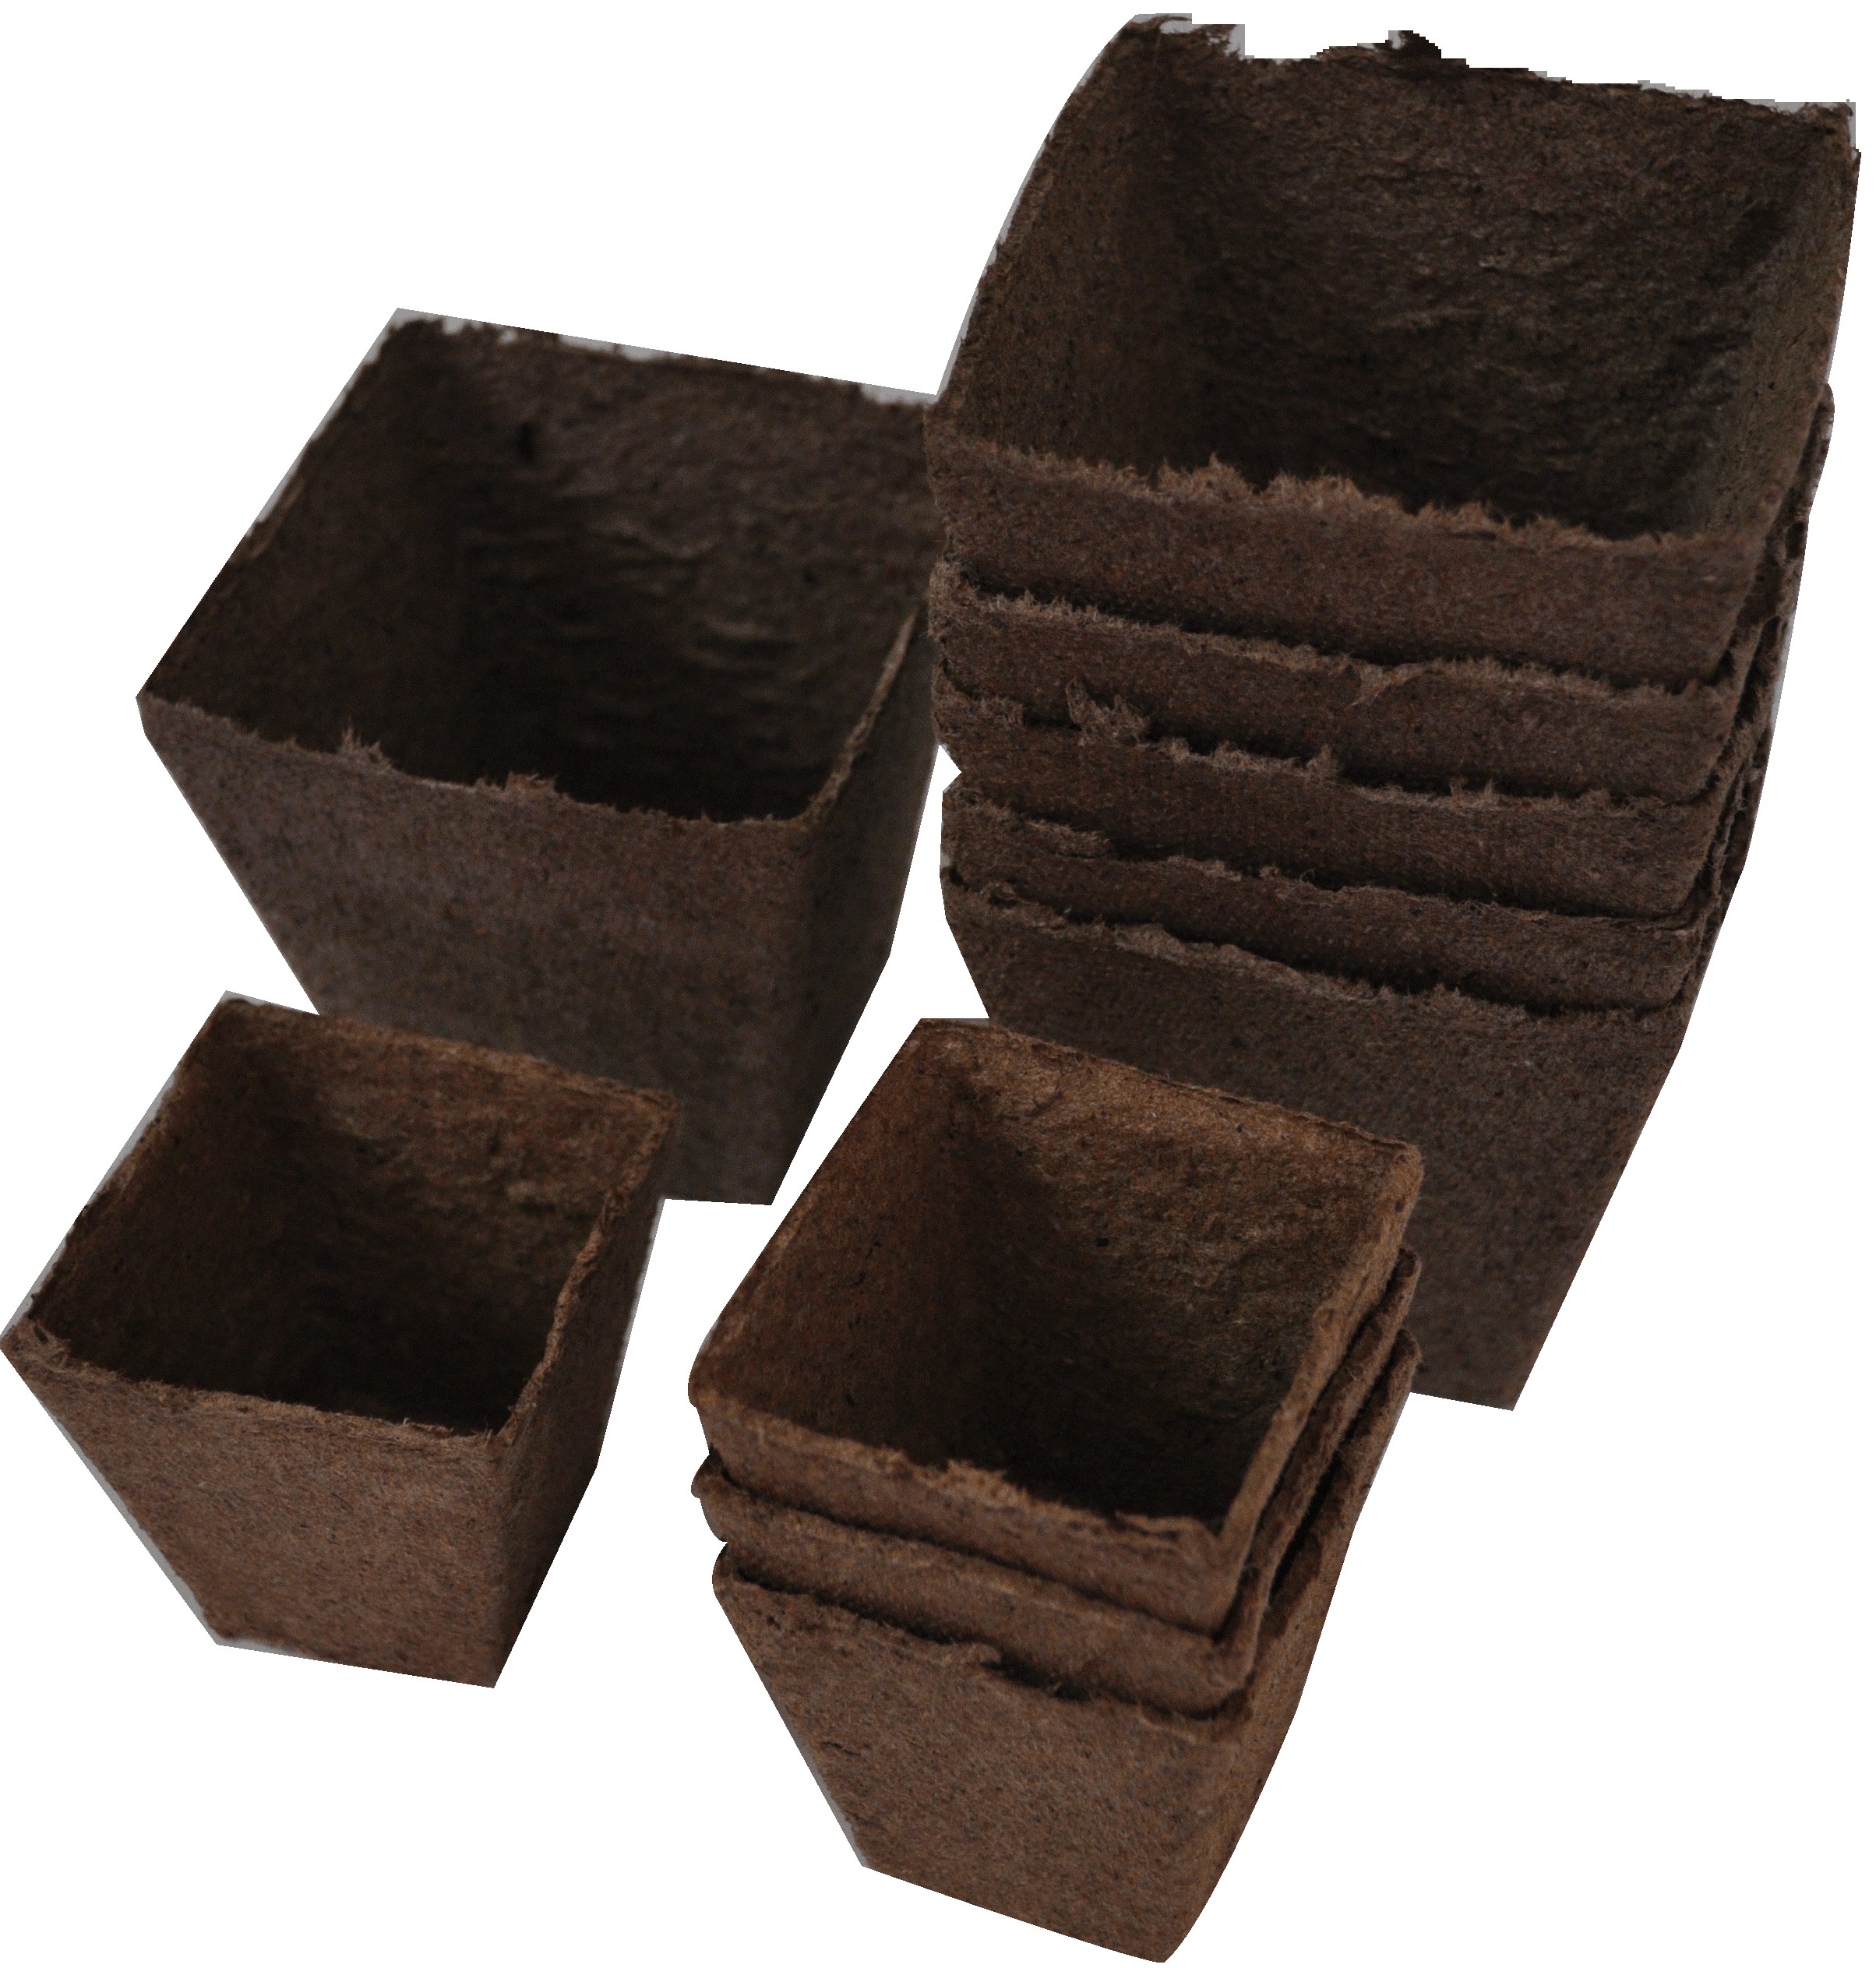
You can start seeds in open trays, in individual plastic packs, or peat pots. Different containers are best because the less you disturb baby roots, the better. Some containers, such as peat pots, transplant right into the garden with the plant during transplanting. Plastic pots must be removed before transplanting.
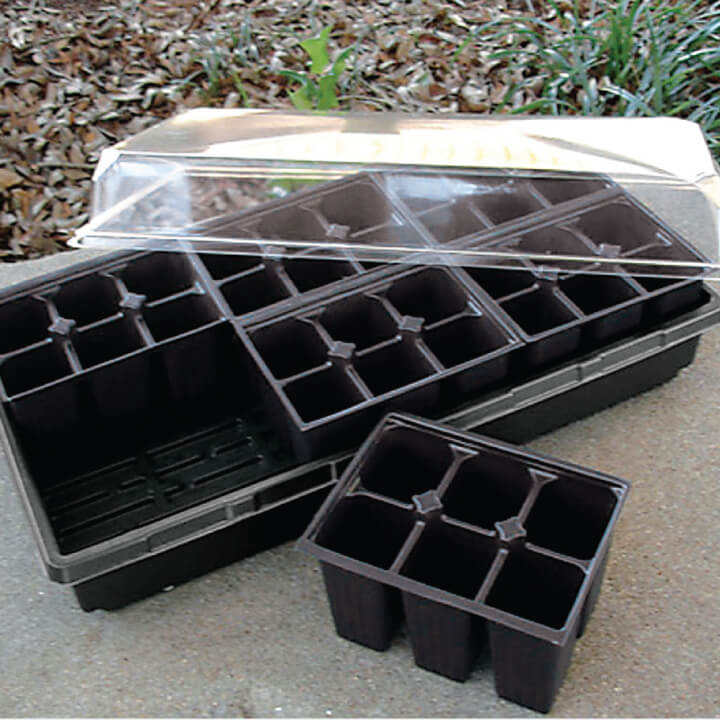
At Grass Pad we have pre-assembled plant starting kits that include the plant tray, plant pack, dome and starter mix. All you need is the garden seeds of your choice.
Use Seed Starting Mix
Pro-MIX BX seed-starting mix is best for starting seeds indoors. Avoid potting soils with fertilizers – these are meant for mature plants and may do more harm than good for starting seeds. PRO-MIX BX is a solution for growers seeking to benefit from both the nutrient holding ability of vermiculite and a perlite content providing good drainage. Mixed with high-quality fibrous peat moss, this formulation is ideal for growers looking for a general purpose medium which creates a well-balanced growing environment.
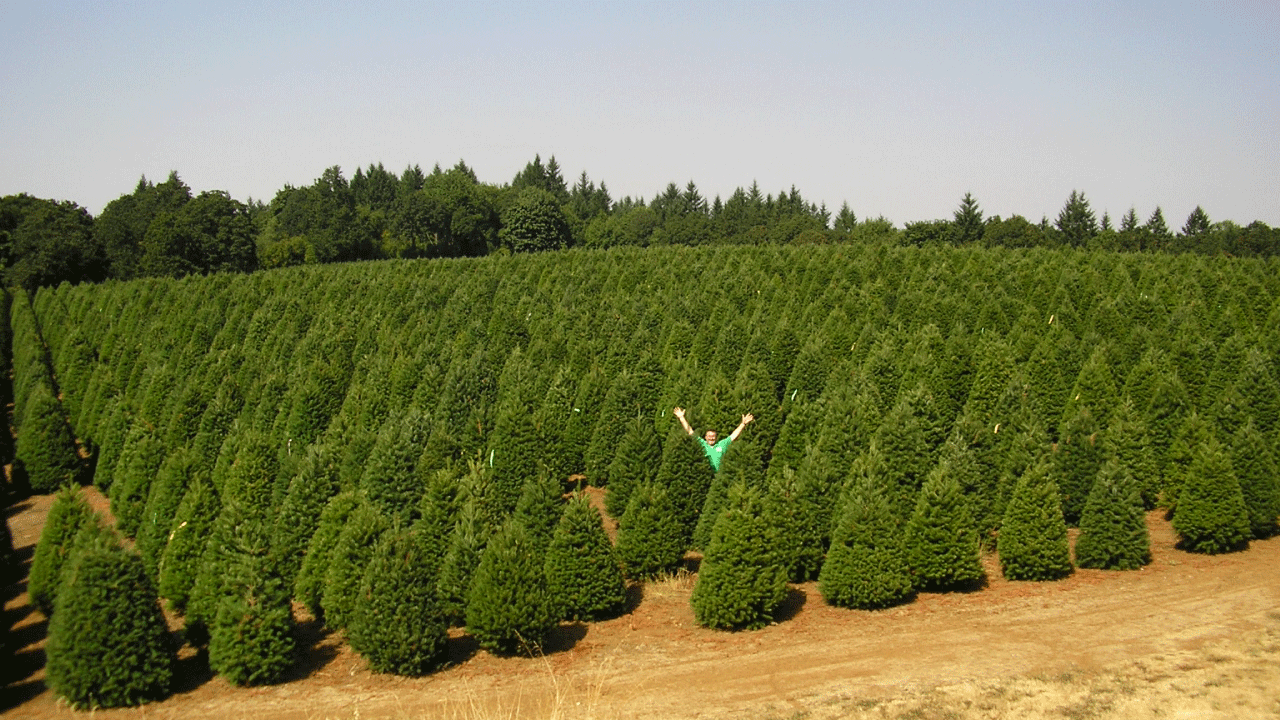
Real Christmas Trees at Kansas City Area Grass Pads
Real vs. Fake Christmas Trees
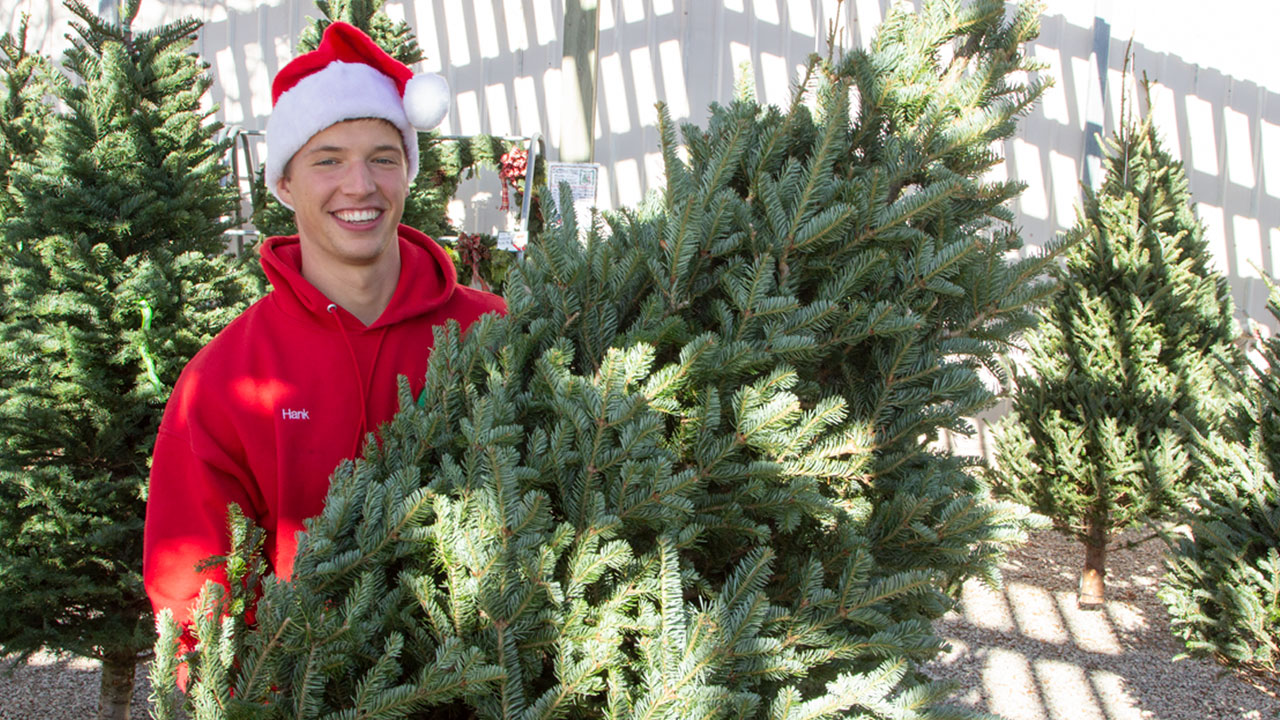
Uncle says, NO PLASTIC TREES! Each holiday season news articles, web sites and commentators debate whether it is better for the environment to use a plastic artificial Christmas tree or a real Christmas tree. Uncle says “be green and buy real green”. A real Christmas tree is five times more environmentally compatible than a plastic artificial Christmas tree.
How Long Does a Real Christmas Tree Last?
With proper care, a real Christmas tree will last about five to six weeks indoors. To ensure the longest life from the tree, be sure to follow Uncle’s tips on Christmas tree preservation:
Remove Loose Needles – Through the natural growing process of evergreen trees, the tree will have pre-existing needle loss on interior branches. Tapping the tree trunk firmly against the ground and shaking it will remove most of the needles.
Reduce Needle Drop – Use Wilt-Pruf, an antitranspirant, to slow moisture evaporation from the needles. Before bringing the tree into the house, spray Wilt-Pruf to thoroughly coat needles to reduce premature needle loss.
Preserve Tree Moisture – Making sure the tree has water in the stand at all times will ensure that the tree lives as long as possible.
Use Uncle’s Tree Life Kit – This special formula is designed to feed your tree while it is in the stand. Place the tree into the stand or bucket within one hour of a fresh cut. Mix Tree Life with warm water at the recommended ratio and fill the stand or bucket. Check the solution every 8-12 hours for the first 3 days and re-fill to keep at max capacity.
Tree Placement – For maximum needle retention, place the fresh cut Christmas tree away from any home appliance or areas that produce heat or drafts. This includes fireplaces, radiators, vents and TVs or stereo systems.
Types of Real Christmas Trees
There are a couple types of Christmas trees available for sale at the Grass Pad – the different types work well for different situations. See below for more info about the types we will have in stock this year.
Oregon Noble Fir
– Most desired of all varieties
– Rich blue-ish green with a hint of silver
– Best for heavy ornaments
– Layered branching
– Pleasant aromatic scent
– Best needle retention
– Excellent for wreaths and garland
Northern Fraser Fir
– Popular value priced tree
– Open branching
– Dark blue-green needles
– Good for heavy ornaments
– Pleasant fragrance
– Good needle retention
There are more than 4,000 Christmas tree recycling programs throughout the United States. Plastic artificial Christmas trees are a petroleum-based, non-biodegradable product manufactured primarily in Chinese factories. Eighty percent (80%) of artificial Christmas trees worldwide are manufactured in China.
Real Christmas Trees:
– Are Recyclable
– Are Biodegradable
– Are 100% Grown in the USA
– Absorb Carbon Dioxide
– Emit Oxygen
– Help Stabilize Soil
– Provide Wildlife Refuge
– Protect Water Supplies
– Are more Eco-Friendly
Winter Preparations for Spring Lawn Domination
Preparing for Winter Dormancy
When the sun is shining on a mild winter’s day, many of us are looking out our windows and asking ourselves, “Is there anything I should be doing to my lawn?” Besides checking Craiglist and Facebook Marketplace for good deals on lawn equipment, there is not much you need to do. However, if you have a busy lifestyle and have just not had the time to get all your lawn preparations checked off, a sunny, mild day in winter is a great time to complete them. Here are a few reminders for the next break in the weather.
Get Fall Wrapped Up
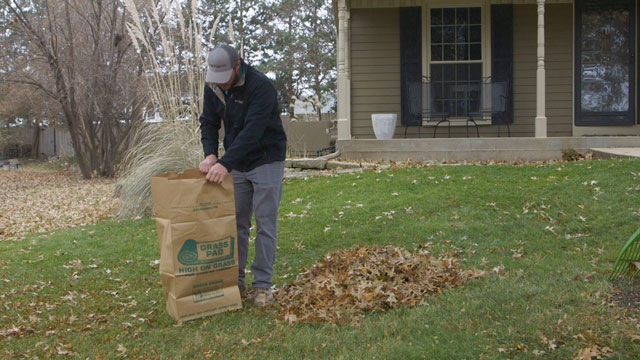
It’s time to get those last few leaves composted, mulched, or removed from the lawn before the snow season arrives. Heavy piles of unmulched leaves block sunlight, air movement, and moisture in the soil. A thin layer of mulched leaves is good, but it must be thin enough to allow the sun, air, and water to reach the grass.
Winter Food for Lawns
Mulched leaves are beneficial but won’t supply enough nutrients for healthy turf. Apply Snowman, winter root builder, on a day when the ground is not frozen. Snowman winter root builder is low nitrogen with added phosphorous and potash for root growth and disease resistance. Grass roots will continue to grow till the soil is frozen hard.
Lawn-Cal for Winter Lawns
Salt from ice melter used on roads, driveways, and sidewalks can cause severe damage to grass, trees, and small shrubs. Now is the time to apply Grass Pad’s Lawn Cal, which contains beneficial lawn calcium. Calcium will play a physiological role in recovering sodic soil and improving the soil structure to allow sodium to leach from the soil.
Preparing Trees and Shrubs for Winter
Prune or cut off any dead growth from trees and shrubs to discourage insects who choose to hide there for the winter. Remove branches that overlap and rub against each other.
Avoid pruning spring flowering shrubs such as lilac, azalea, and specific hydrangea. These shrubs form their spring flower buds over late summer and fall. Any pruning of these shrubs, though not life-threatening, will be removing spring flowers. Prune spring flowering shrubs after the bloom petals have fallen next spring.
Dormant oil can be applied on a mild day above 40 degrees. Use over a burning bush, euonymous, pines, or spruce to control scale and other insect eggs, such as spider mites.
Protect young trees from animals by wrapping stems or trunks with wire mesh. Smooth bark trees such as Red maples should be protected with tree wrap to prevent winter sun scalding.
Preparing Perennial Gardens for Winter
Cut back dry stems to soil level to prevent rotting in flower beds.
Procrastinators, if you have not planted your tulips, daffodils, crocus, and hyacinth, get them into the ground soon. The ground is still workable now, but it won’t be long before we have a frozen tundra.
Mulch flower beds once extreme cold weather arrives. Adding a fresh layer of mulch around plantings will give the landscape a neat appearance while keeping the temperatures around the plants consistent. Mulch will hold moisture in the soil, one of the most important parts of fighting winter stress.
Garden Tools Need Attention
Oil garden hand tools to extend their life. A thin layer of vegetable oil will help to protect your shovels, spades, axes, and hoes from moisture and winter rust. Extend the life of your garden hoses by storing them in the shed, garage, or basement.
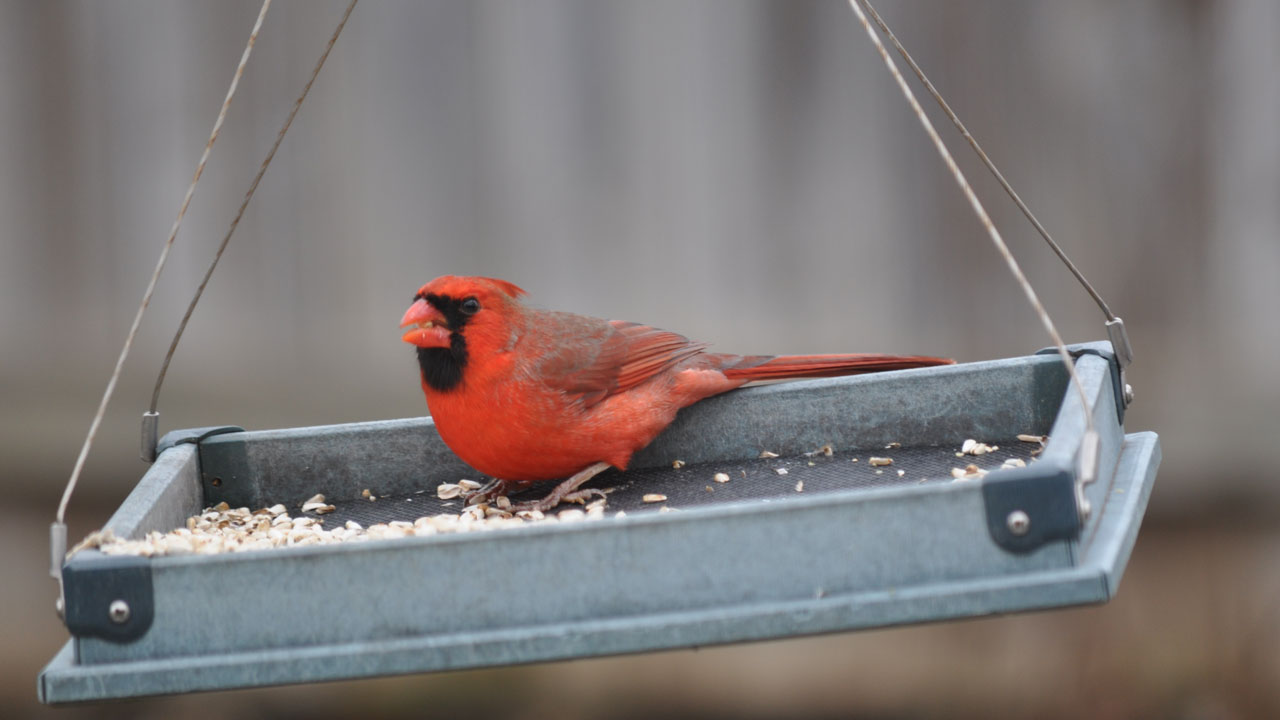
Feeders for the Birds
- Clean bird feeders each season.
- Bird houses provide shelter from the weather and a haven from cats and other predators.
- As temperatures fall, high fat, high-calorie suet is the perfect food to help birds get through long cold nights.
- Keep a low level of fresh water in a clean bird bath. A bird bath heater will keep the water from freezing.
See Related: Bird Feeders and Bird Seed
Dry Winter? Pull The Hoses Back Out!
If late fall & winter have been extremely dry, that means your grass (and your landscape!) is thirsty, so get that hose back out and start watering. Deep watering help the roots of your grass and your plants establish better before the long winter, so find a couple of these warm, sunny days and get some water down.
More Related Articles to Summer Lawn Survival
What is Dormant Seeding?
- The benefits of dormant seeding. Learn More at this Link
Snowman – Key to Lawn Domination
- Why Snowman is essential for a healthy lawn. Learn More at this Link
Bird Feeders & Bird Seed
- What type of bird feeder do you need for your backyard? Learn More at this Link
When to Prune a Hydrangea
- Different hydrangeas require different pruning times. Learn More at this Link
Benefits of adding Calcium to Your Lawns Diet
- Adding calcium to your lawn has many benefits for a healthy lawn. Learn More at this Link
How to Plant Spring Flowering Bulbs
Buying Spring Bulbs
When: At the Grass Pad we begin to stock our spring-flowering bulbs around the first of September, and we’d suggest buying them as soon as they become available. This will allow you to store them in ideal conditions in a cool, dark, dry place with good air circulation until it’s time to plant.
Location: Not all bulbs are alike when it comes to growing conditions and appearance. When choosing bulbs, keep the planting site in mind. Today’s selection of bulb extends far beyond your standard daffodils, hyacinth, iris, lily and tulips. Crocus, alliums, snowdrops and scilla have all seen an increase in popularity in the last few years.
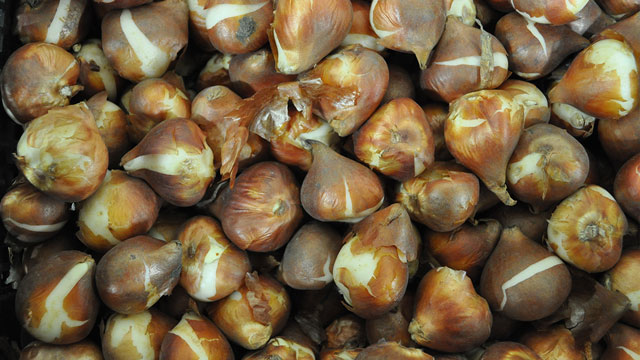
Size: Bulbs are graded by the grower based on their diameter, so you’ll likely get the best performance from the ones that are large for their type. Since bulb size may differ by variety, be sure you’re only comparing a bulb against others of the same variety.
Condition: Don’t worry if the bulb’s papery skin is a bit ripped; that won’t affect its performance. However, do avoid bulbs with deep cuts, bruises or soft spots, as these injuries provide an invitation for disease. Likewise, try to avoid ones with significant signs of mold or rot.
Where to Plant Spring Bulbs
Bulbs can be planted in borders, perennial gardens, rock gardens, woodland settings, natural lawns and even in patio containers. Wherever you choose to plant them, you’ll want to remember that most bulbs prefer well-drained soil and full sun. Avoid areas and containers where water tends to puddle. In addition, bulbs need warmth and light to trigger their spring growth.
While many people enjoy the natural look of planting bulbs in their lawns, it’s crucial that you choose spots that won’t need mowing during the early spring. Once the flowers have faded, you’ll need to allow the foliage to continue to grow for up to six weeks before it dies back; this ensures a strong return the following spring.
When to Plant Spring Blooming Bulbs
Plant bulbs before the ground freezes in the fall. They’ll do best if they have some time to establish roots before any extreme cold weather arrives, which means mid-October through November. It’s always best to come and pick out your bulbs in September or October to ensure that you get the best variety to choose from.
How to Plant Spring Blooming Bulbs
Bulb-planting tools are great for planting bulbs one at a time, but if clumps and mass plantings are part of the plan, then a trowel or shovel allows for digging trenches or large holes. Bulb planting is easiest if you dig one large hole rather than numerous small ones.
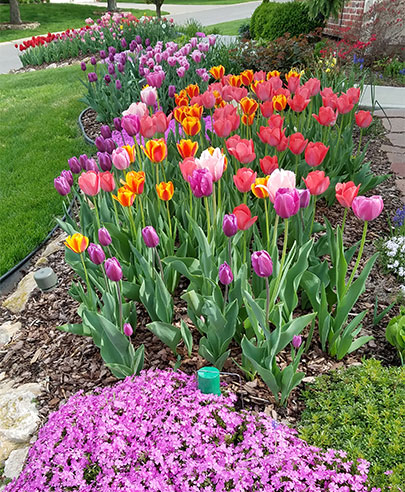
Creative planting will yield eye-catching results in the spring. Consider curving trenches, planting bulbs in layers, mixing bold colors such as red and yellow tulips, or planting different bulbs in mixed clumps. Pay close attention to the depth requirements of different bulbs. A rule of thumb is to plant four times deeper than the bulb diameter.
Once planted, give bulbs a thorough watering since bulbs are often 6 inches or deeper. A deep watering ensures they actually get the moisture. If the fall season turns out to be particularly dry, you may need to provide additional watering so the soil doesn’t dry out before it freezes. Adding 2 inches of mulch over the soils will help retain moisture and moderate soil temperatures.
Uncle’s Tip – Which End Is Up?
Plant with the pointed end towards the surface. Often you’ll have a flat bottom and roots to help you out. A few bulbs make it difficult to tell top from bottom, if all else fails, you can plant the bulb sideways and you’ll still get normal growth.
Troubleshooting Spring Bulbs
Deer and rodents can provide challenging growing conditions. Look for bulbs that don’t attract the pest you’re having trouble with. For example, while deer love tulips, they aren’t likely to eat daffodils. Fritillaria imperalis (skunk lilly) is known for emitting an odor that repels rodents.
If you’ve had trouble with no-show bulbs in their first year, it may be due to animals digging them up, bulb rot or bulbs planted too late or too shallow.
While first-year bulbs are known for flowering in most conditions, repeat performances may prove troublesome in shady areas or if the foliage gets removed from the plant before it yellows. But, if you follow the guidelines here, pay attention to variety requirements for the bulbs you purchase and give them the right place to grow, your spring will be blooming for sure.
Tulips
Tulips Tulips Tulips
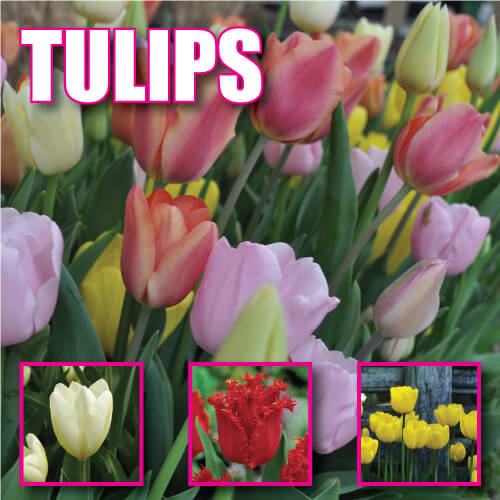
Chosen as the most Fantastic Spring Flowering Bulb tulips continue to be the most popular with our customers. Valued for their flowers, tulips are deeply rooted into the Dutch culture. At one time, the entire Dutch economy was built upon the tulip. Originally from Turkey, tulips were brought to Eastern Europe in the 16th century, and have now become one of the world’s most admired flowers.
See Related: Planting Spring Bulbs
Triumph Tulips
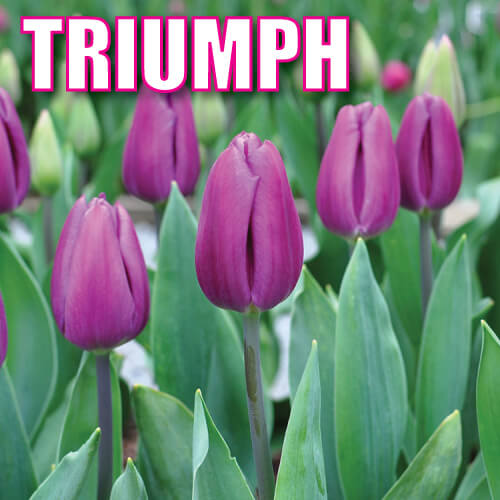
Triumph tulips are the most popular of all varieties. With its traditional shape tulip bloom, Triumph tulips are available in almost any color imaginable. Grown on a sturdy stem, Triumph makes an attractive garden flower as well as a fresh cut flower with a very long vase life.

Darwin Tulips
Darwin hybrid tulips have the tallest and largest blooms and make an excellent choice for the home garden. Most Darwin hybrids are early season bloomers. An interesting side note, Darwin blooms have a habit of closing during cooler nights and opening with the warming sun.

Emperor Tulips
Fosteriana tulips, known as Emperor tulips, are an excellent choice to fill your flower beds with a full season of color. With a uniquely shaped wide and long flower, Fosteriana tulips grow medium to tall. Emperor tulips are most impressive when planted in masses.

Greigii Tulips
Greigii tulips bring the most fun to the garden spaces and planters. With variegated stems and shorter in stature, Greigii tulips pop with a massive flower bloom. The striped stems with purple streaks give flower beds and containers a little extra pizazz in early spring. Excellent choice for rock gardens, borders and containers.
Fringed Tulips
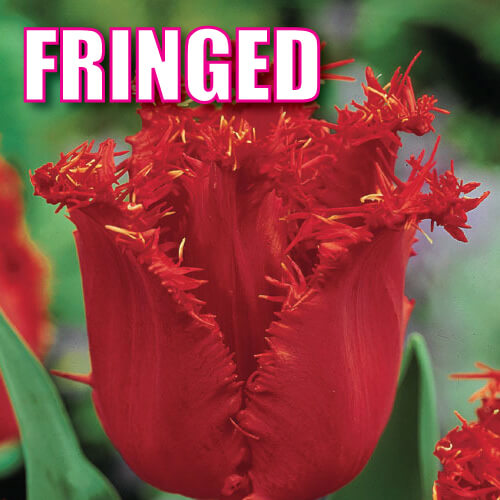
Fringed tulips are the “shock and awe” of the tulip garden. One look at these distinctively shaped blooms and folks will be turning their heads. For an extended bloom life, plant fringed tulips in protected or covered areas. The flowers tend to hold water inside the petal and can shorten the bloom time.
Parrot Tulips
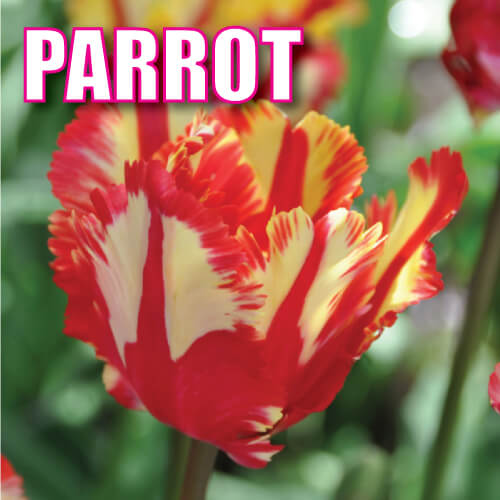
Parrot Tulips have a ruffled and feather like texture resembling the wings of a parrot. Parrot tulips are the most outrageous of all tulip varieties. Most Parrot tulips are late season bloomers. The blooms tend to open with more sunlight and sometimes change colors as the flower matures. Their unique flower shape can make them susceptible to the wind and heavy rain damage, so it is best to plant in a protected area.
Related Articles to Tulips
Uncle’s Root Accelerator – Keeping Plants Healthy
- Uncle’s Root Accelerator gives plants a healthy start. Learn More at this Link
Uncle’s Max Mix – The Secret is in the Soil
- Uncle’s Max Mix is a premium-grade horticultural planting mix. Learn More at this Link
Fantastic Five Spring Flowering Bulbs
- Five great ideas for Idiot-Proof Spring flowering bulbs. Learn More at this Link.
Grass Pad Nursery Stock
- Search Idiot-Proof plant selections available at Grass Pad. Learn more at this link.
Fantastic Five Spring Flowering Bulbs
Colorful masses of eye-catching spring bulbs are an easy cure for those winter doldrums. Bulbs planted in fall make dazzling beds of bright neon colors blooming from February to May. Now is the time to get to the Grass Pad for the best selection. Dutch bulbs shipped straight from Sassenheim to Grass Pad Warehouses have arrived. Dutch Uncle has been buying bulbs from Holland for over 50 years. Uncle knows a Dutch Deal and these are his picks for the Fantastic Five Spring Flowering Bulbs to plant in the mid-west.
See Related: How to Plant Spring Bulbs
No. 5 Allium Bulbs
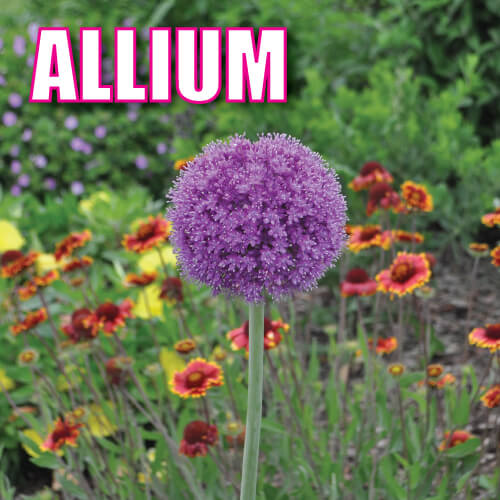
Allium belong to the ornamental onion family. However, these will not be on the dinner plate. These idiot proof bulbs are some of the most distinctive fall planted bulbs adding height and texture to spring gardens. Hardy through most of the mid-west climate, allium tolerate drought and poor soil conditions. Available in a variety of heights, colors, and blooms, allium, with their lollipop look are a fun and whimsical flower to have in the garden.
No 4. Hyacinth
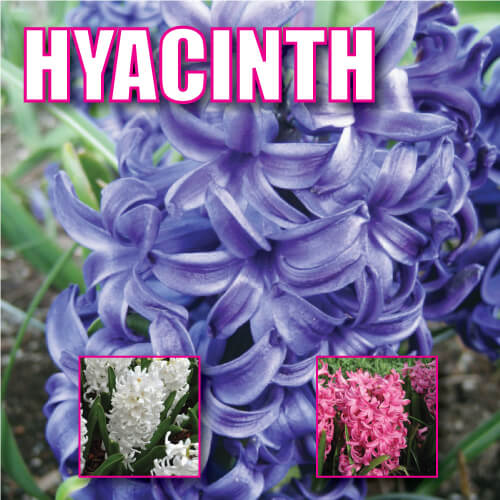
Charming bloom with a fragrance and aroma that will compare to finest French perfumes make hyacinths a Fantastic Spring Flowering Bulb. Hyacinth can be planted by themselves or as a feature in beds mixed with tulips and daffodils. Blooming early to mid-spring. Easily adapting to the mid-west environment, hyacinth has shown to be deer and rodent resistant. A single flower will appear from each bulb along with glossy green leaves. Hyacinth makes an excellent cut flower for color and fragrance. Hyacinth bulbs can be pre-chilled, or forced, for indoor color during winter months.
No. 3 Crocus
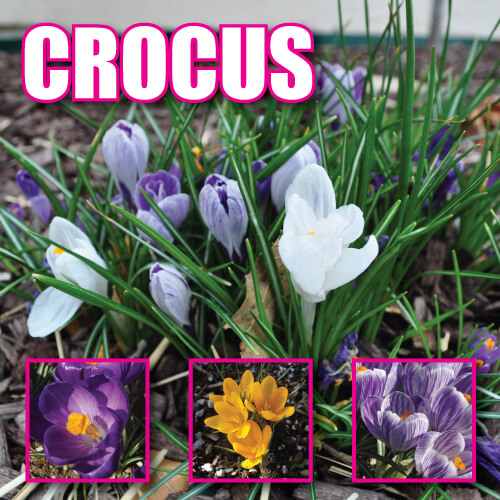
The first flowers to sprout from the earth each spring, crocus bring forth hope for the warmer days and bright blooms of spring. Crocus bulbs must be planted during the autumn months to bloom during the spring. A true perennial, they naturalize well, multiply very quickly, can be planted nearly anywhere, and require little care from one year to the next. They also tend to be highly resistant to deer. Crocus will be flowered and gone by the time daffodils, hyacinths, and tulips begin to color – their addition is an excellent way to extend the bloom season in a garden.
No. 2 Daffodils
Daffodils are the idiot proof bulb demanding the least effort for the highest reward. Undoubtedly one of the most recognized flowers, daffodils are extremely hardy and easily naturalize here in the mid-west. Daffodils must be planted in late fall to grow and bloom with their trumpet-shaped flowers, heralding the announcement of the spring. Most often spotted blooming in varieties of yellow, daffodils are available in a few other colors and bi-colored combinations. Inspiring when planted in clusters, daffodils make an excellent cut flower. One bulb can grow many stems and have one bloom on each. Available in various heights, colors and bloom times, daffodil will stay in color for many weeks.
Uncle’s tip: Daffodils are one of the few garden flowers resistant to deer and rodents.
No. 1 Tulips
The most fantastic flowering bulb is the tulip. Prized for the flowers, tulips are deeply rooted in the Dutch culture and economy. Stunningly beautiful when clustered into large garden spaces and containers, tulips are the superstar of any flower bed or container. When complimented with crocus, daffodil or hyacinth tulips will make brilliant spring color combinations. The rainbow of colors available in tulips alone is unmatched. A mixture of early, mid and late season bloom times allows tulips to create color beds and containers for an extended period in spring.
See Related: Types of Tulips
More Related Articles to Tulips:
Uncle’s Root Accelerator – Keeping Plants Healthy
- Uncle’s Root Accelerator gives plants a healthy start. Learn More at this Link
Uncle’s Max Mix – The Secret is in the Soil
- Uncle’s Max Mix is a premium-grade horticultural planting mix. Learn More at this Link
Types of Tulips
- Early, Mid, and Late Season blooming tulips. Darwin, Emperor, Parrot types and more. Learn More at this link
Grass Pad Nursery Stock
- Search Idiot-Proof plant selections available at Grass Pad. Learn more at this link.
How to Fertilize for Healthy Trees and Shrubs
- Tips for fertilizing new and existing shrubs in landscapes. Learn more at this link.
Fertilize for Healthy Trees and Shrubs
Feed Trees and Shrubs
Fertilizing trees and shrubs is a necessity, and that includes fruit trees. One of the most significant benefits of fertilizing trees is the preventative maintenance they provide. Landscape shrubs and trees require sufficient energy stores to remain healthy to survive insect and environmental stress. Trees and shrubs are a valuable part of your property, and it is essential to protect your investment. Established trees and shrubs can be easily fed by homeowners using tree food spikes or granular tree food applications. For best results, provide your trees twice yearly, once in early spring and once mid-fall.
What are Tree Food Spikes?
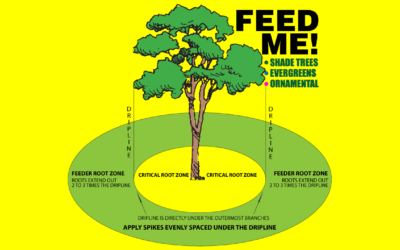
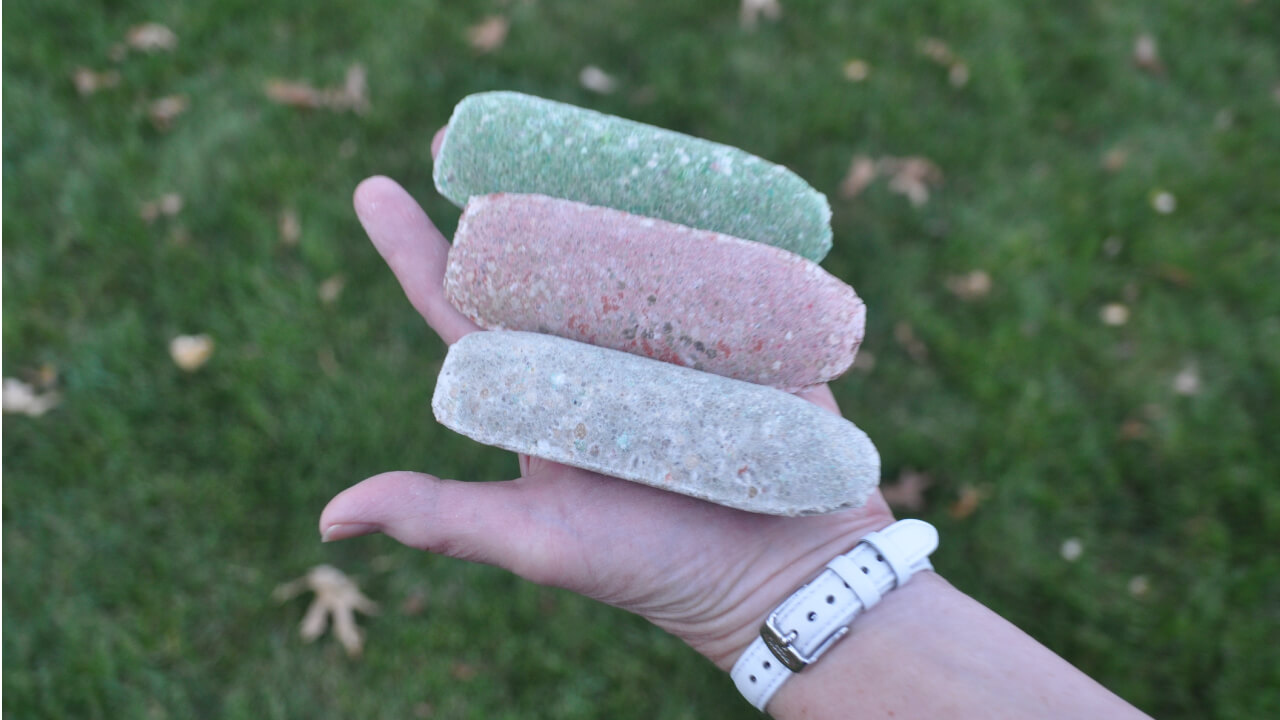
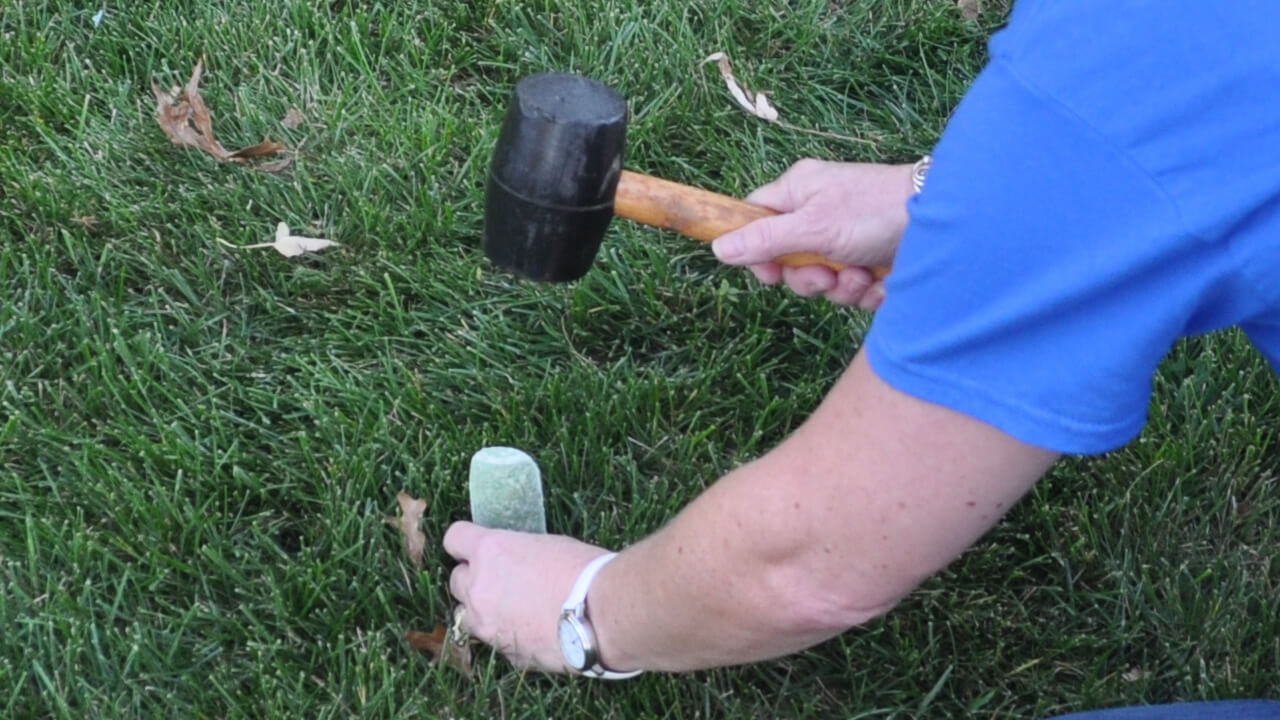
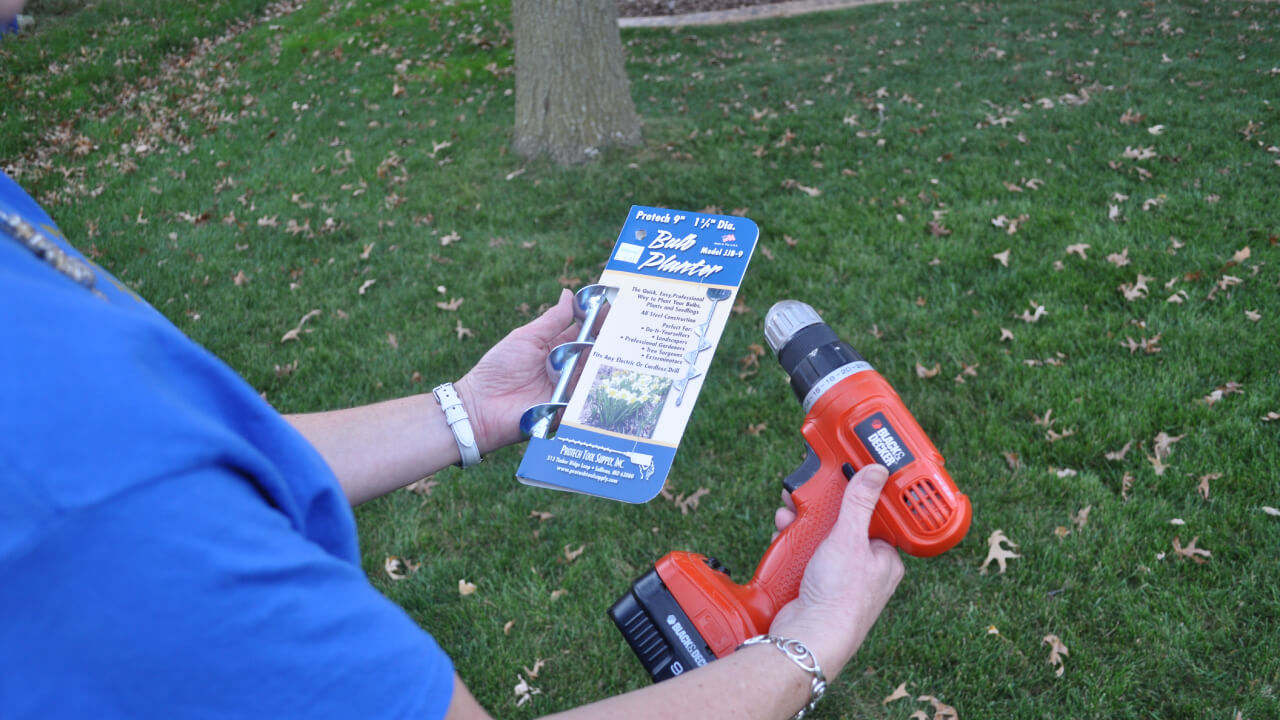
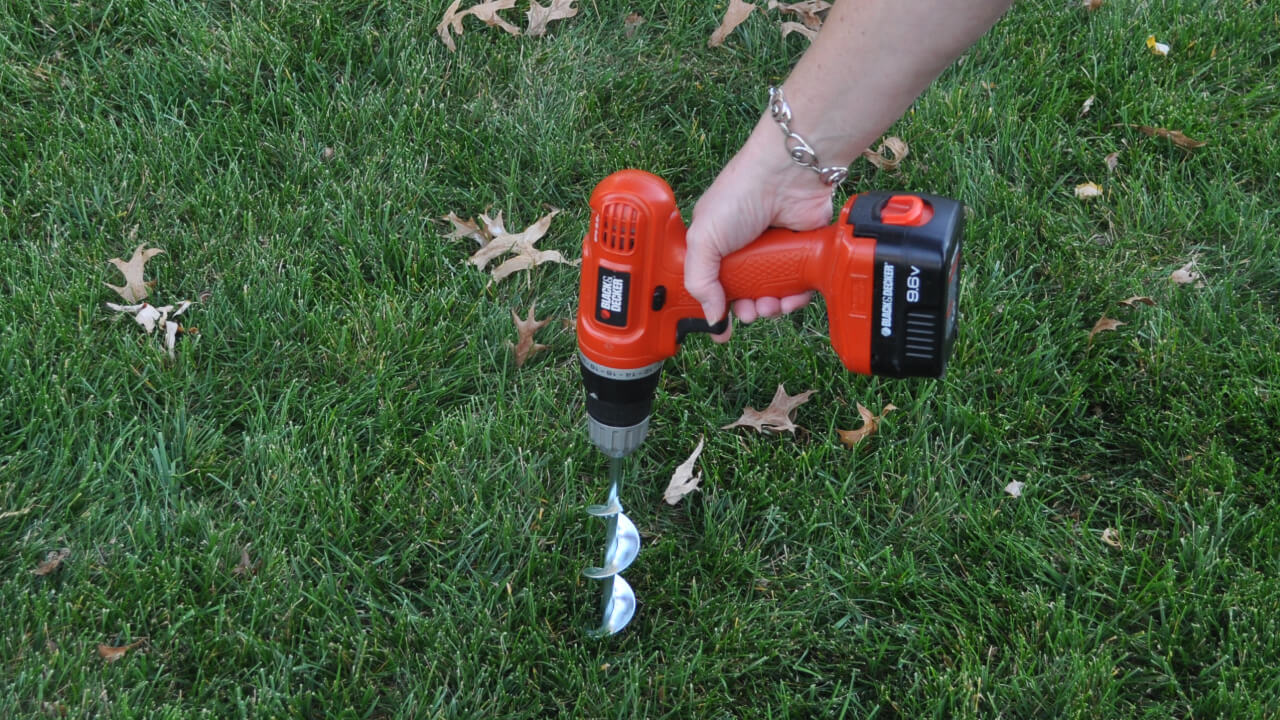
Tree food spikes are the easiest method for feeding established trees. Tree food spikes are compressed cylinders of slow-release fertilizers. Gradually dissolving, tree spikes release nutrients evenly throughout the season. A mallet or hammer can drive These compressed spikes into the ground. In a dry season, using an auger attachment for a drill makes installation more convenient. Once the quantity of tree spikes needed has been determined, drive the spikes into the soil, spacing them evenly near the tree’s drip line. The drip line is the imaginary ring on the ground directly below the outer circumference of the tree’s branches. For small trees and shrubs requiring only one or two spikes, break spikes in half to allow for a uniform distribution pattern.
How Many Tree Food Spikes?
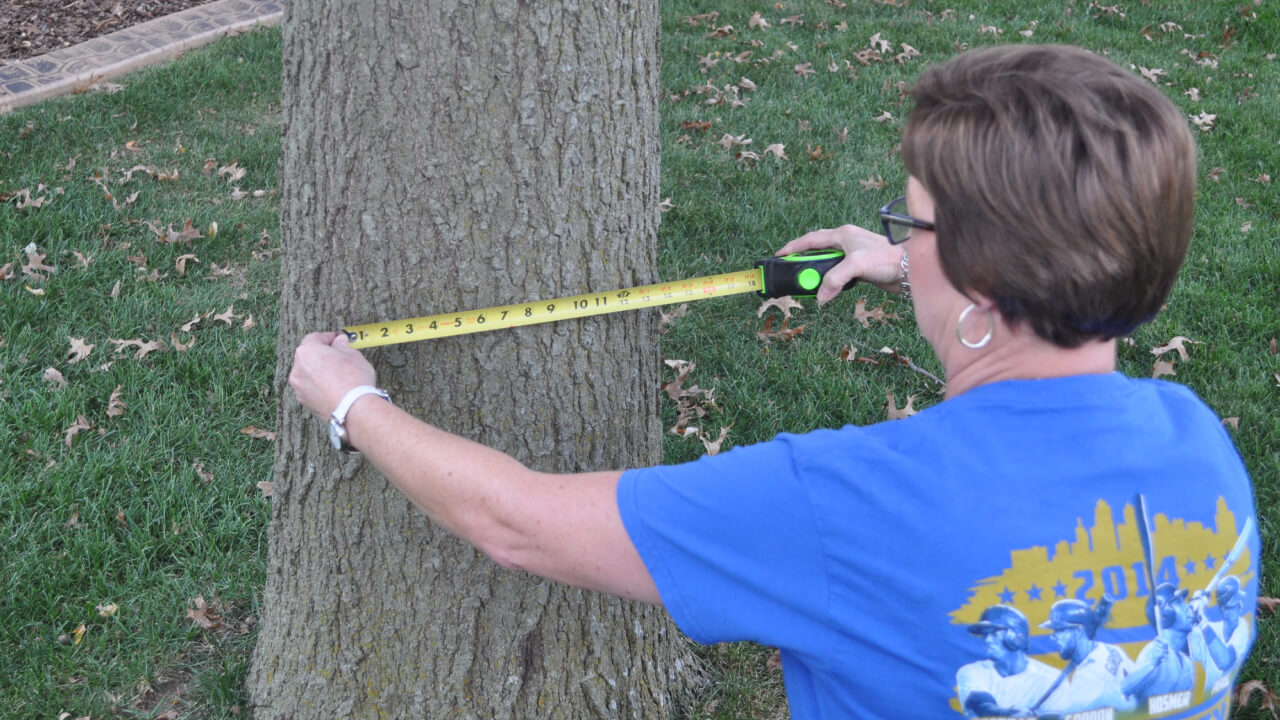
Measure your tree trunk diameter 18 inches from the ground for the most accurate measurement. Bring your tree measurements to the Grass Pad, and our Green Team can help you determine how many spikes or tablets are required for your landscape. Fertilizer formulas are available for evergreen, shade, ornamental, and fruit trees. Also, there are formulas fortified with iron for plants needing iron supplements, such as azaleas, rhododendrons, or chlorotic pin oaks.
Uncle’s Tip: Do not use tree food spikes on newly installed trees or shrubs. Spikes contain fertilizers in amounts not recommended for new trees or shrubs. Use Uncle’s Root Accelerator for the first 12 months for newly planted trees.
Granular Application Tree Food
Uncle’s Green Love is specifically suitable for trees such as oak that thrive with iron in their diet. Spread granulated tree food over the feeder root zone using a push or hand spreader, or use an auger to drill holes and fill. Green Love is a non-burning bio-solid fertilizer that slowly releases nutrients to feed trees and shrubs for up to ten weeks. Green Love contains a low nitrogen, slow-release fertilizer formula to enhance root establishment, disease resistance, and plant vigor. Use five pounds of Green Love per inch of trunk diameter for established trees.
Also available is Uncle’s Tree Food, a multi-purpose granule tree food. Uncle’s Tree Food is formulated to feed ornamental trees, shrubs, and large shade trees.
How to Fertilize Newly Planted Trees and Shrubs
If you are planting new landscapes, avoid using fertilizer spikes until the plant has been established for at least one year. New plantings require a unique fertilizer formulation to accelerate root development. Uncle’s Root Accelerator is intended for new plantings and is recommended for all trees and shrubs at installation. Applied once per month for the first year, Root Accelerator will ensure transplanting success. Uncle’s Root Accelerator is a liquid-concentrated plant starter fertilizer mixed with water and then poured around the tree’s base or shrub. The liquid is immediately available to the plant, encouraging healthy root growth.
See Related: Transplanting New Trees and Shrubs
More Related Articles on Tree Care
Pin Oaks Leaves are Yellow
- How to treat chlorotic Pin Oaks. Learn More at this Link
Max Mix Landscape Planting Mix
- Transplanting new plants and trees? Use Grass Pad’s Max Mix. Learn More at this Link
Controlling Emerald Ash Borer
- Preventing the spread of the EAP. Learn More at this Link
Fruit Tree Maintenance
- Tips on pollinators, battling disease, and insects on fruit trees. Learn More at this Link
Guide to Successful Tree and Shrub Planting
How to Plant Trees and Bushes
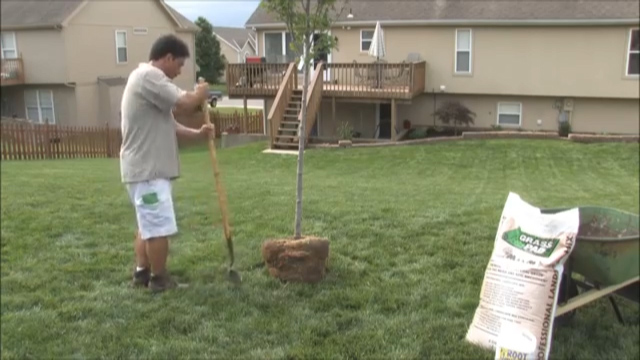
Start by finding the appropriate area for the tree or bush, paying attention to sun and water requirements. The key to success with any plant starts in the roots. Strong, healthy roots need good drainage, aeration and lots of organic matter to grow and thrive.
Step 1 – Dig the Hole Twice as Wide as the Pot
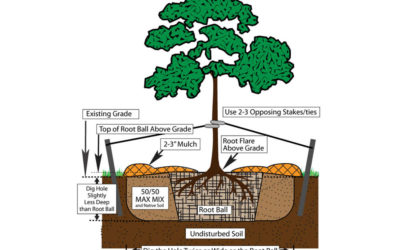
Dig the hole for the plant twice as wide as the container and not quite as deep as the container or root ball. When you remove the plant from the pot, the top of the soil on the root ball should be slightly above the grade of the surrounding earth. In heavy clay soil, we recommend that 25% of the root ball be above grade. Keep the soil nearby – you’ll need it to refill the hole. Remove the plant from the container and place into the new hole.
Step 2 – Remove the Plant from Its Container
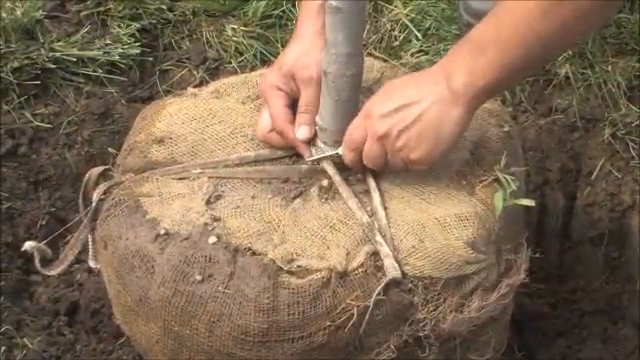
Remove any twine, rope, straps, burlap or wire basket from around the root ball, being careful not to damage the bark. Using your hands gently loosen the roots from the root ball, and cut off any circling or matted roots. This allows the roots to start growing outward and downward into the soil. Plants become “root bound” in the pot, which means they are tightly twisted around each other. Loosening the roots is an essential step for plant growth. Make sure the root flare is visible above the existing grade (see image at top of page).
Step 3 – Backfill the Hole with Soil and Max Mix
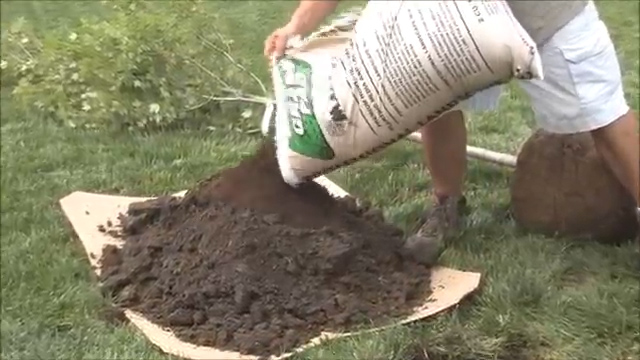
Backfill the hole with a mixture of 50% native soil (the soil you dug out of the hole) and 50% Uncle’s Max Mix premium landscapers mix. Max Mix serves as a nutrient-rich growing medium, and blending it with the native soil gives the plant a transition zone where it can adjust to the native soil. Remove any air pockets while backfilling by tamping down with your foot periodically or by watering the hole incrementally as you fill it. The plant’s roots will not be able to grow through any air pockets that exist in the soil, so it is vital to remove them. Very little backfill should be on top of the root ball.
Step 4 – Cover the Plant Area with Mulch
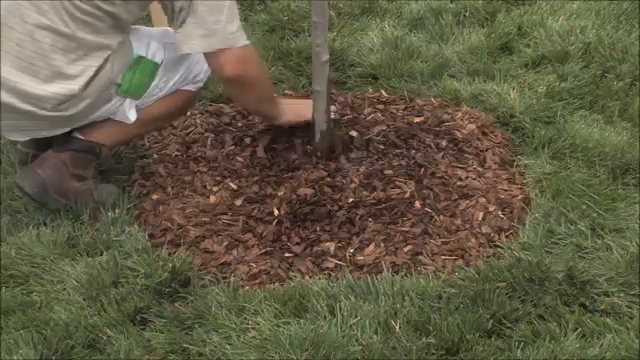
Next, cover the newly planted tree or bush with mulch, ensuring that the mulch stays at least 3-4 inches from the trunk of the plant. Mulching keeps the sun and wind from drying out the top of the root ball and also helps prevent weeds and grass from growing on top of the root ball.
See Related: Types of Mulch
Step 5 – Stake the Tree
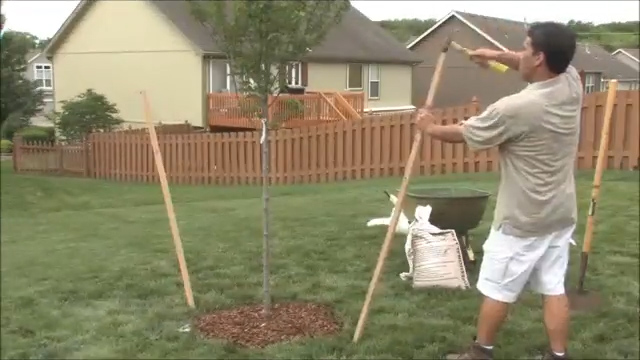
To give the new tree support, stake the tree to protect it from the prevailing winds, which in our part of the world come from the south. Drive the stakes into firm, undisturbed soil. Run the support wire through a protective tube or strap so that it doesn’t damage the tree. The tree should be tethered to the stakes with adequate tension to allow some free movement in all directions, while preventing it from falling over in heavy winds.. Remove all stakes, wires and straps after the first full growing season.
Step 6 – Water and Feed the Plant!
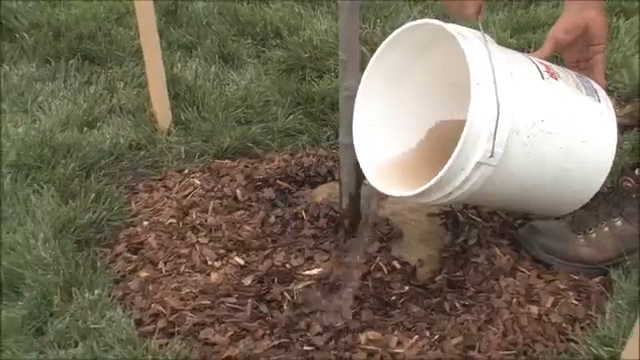
The final step is to fertilize and water the plant immediately after planting. Use Uncle’s Root Accelerator as a fertilizer for all newly planted plants. This fertilizer is designed to feed the root system of the plant, rather than promote top growth. The plant needs to develop a strong root system during the first year so that it can feed itself in the future.
Watering will be essential for the success of the plant. We recommend the 3-2-1 approach to watering. Water deeply 3 times per week the first week, 2 times the second week and once a week thereafter. For example, if the root ball was in a five gallon container, watering deeply means putting at least five gallons of water on the plant each watering. Come in and ask our experts for more information about watering your new plants.
Root Accelerator Dilution Chart
| Pot Size / Caliber | Gal. of Water | oz. of Accelerator |
| #1 | 1 | 3 |
| #2 | 2 | 6 |
| #3/5 | 5 | 15 |
| #7 | 7 | 21 |
| #10-25 | 10 | 30 |
| 1.5" | 10 | 30 |
| 2"+ | 10 | 30 |
5 Tips to Keep Grass Growing Under Trees
How to Keep Grass Growing Under Trees
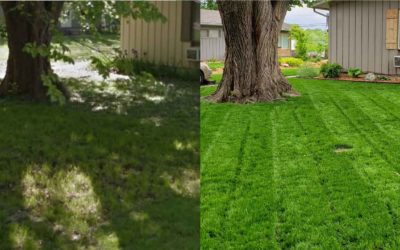
Very little is required to germinate grass seed. The right amount of moisture and heat and grass seed will grow even with no light and no nutrients. Mother Nature designed her grass seeds to sprout in the deep shade of established grasses. Young grass plants tolerate lower light conditions; however, as grass plants mature, more sunlight is required to maintain health and vigor. Lack of vigor will affect turf density allowing weeds to move into the thin areas. While the area under the tree can be heavily shaded, with a little extra effort, it is rarely too shady to grow quality turf. Here are the top five idiot-proof tips for growing grass in heavy shade.
1. Use the Best Grass Seed for Shade!
Uncle’s Premium Shade grass seed is the ideal blend of elite grass seed varieties with lower water and nutrient requirements. The shade grass seed shows improved shade tolerance and increased disease resistance. Reseed shady areas three times a year (April 15, August 15, and September 15). A routine trimester seeding program adds youthful, vigorous, low-light tolerant grass plants into the maturing turf stand.
2. Traffic Management!
Shade-stressed grass plants are less tolerant of heavy wear from foot traffic, so traffic management may be required. Active dog runs in shady areas may require physical barriers to alter the dog’s traffic patterns. A runway of mulch along the fence could be your best option for large active canines, giving them an area to run without destroying the grass. Relieving soil compaction would be beneficial in heavy traffic zones.
3. Deep Water Shade Areas!
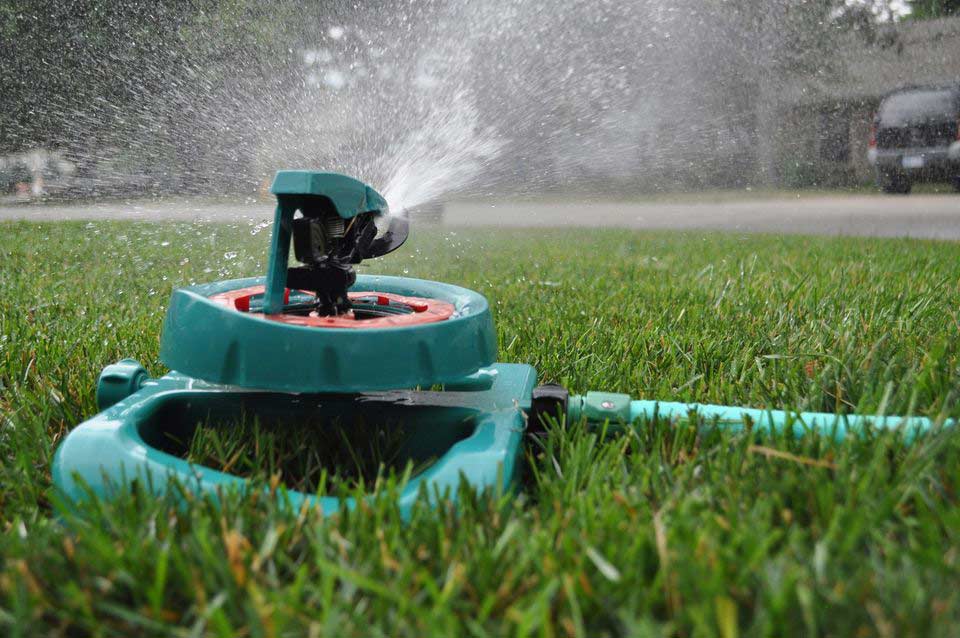
In the spring, with frequent rains, the shade tree and grass are good neighbors – there’s plenty of moisture for everyone. However, when spring rains stop and summer heat sets in, the trees get very unfriendly and selfish. A large shade tree can use hundreds of gallons of water a day, leaving very little moisture for turf grass. Discourage turf disease in summer with deep and infrequent waterings to reduce wet foliage.
4. Improve Sunlight!
This tip maybe your “AHHAH” moment. Intensity and duration of quality light reaching the grass plant are important. The more time the grass plant has in full sunlight, the better it will perform. Pruning lower branches to raise the canopy will increase sun exposure and allow more wind circulation, helping to reduce humid conditions that can stimulate turf disease. Shade areas with restricted air movement may require treatment with Fungus Fighter to maintain a quality turf stand.
5. Reducing Soil Compaction!
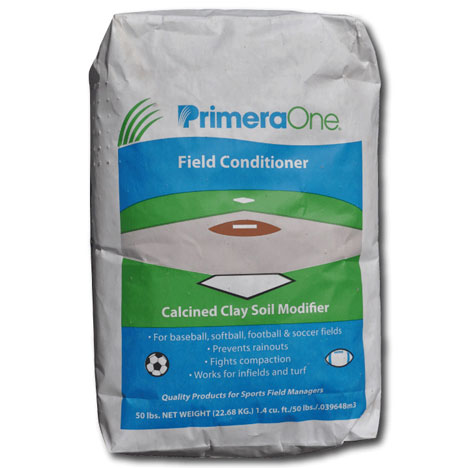
Condition the soil under your shade trees to help reduce soil compaction. Increase the soil’s water holding capacity and improve drainage by core aerating the area and raking Primera Sports Field Conditioner field conditioner into the aeration holes. Primera Sports Field Conditioner is a natural, porous ceramic granule that has incredible air and water holding capacity. Primera Sports Field Conditioner helps to relieve compaction and improve drainage when incorporated into the soil.
What About Large Tree Roots?
Unchecked over the years, soil erosion can expose shallow tree roots. Bare soil erodes quickly with no grass roots to hold soil in place. Top soil can be hauled in to cover exposed roots, but too much soils can be damaging for the tree. Gasses must pass from the air to the roots and from the roots back to the air. Too much soil pack can create real problems for the tree, so be careful! Some surface roots can also be removed. Large surface roots are more for anchorage and with expert help, you may be able to remove a few. Always contact an arborist for advice on removing tree roots.
More Related Articles to Idiot-Proof Fall Lawn Renovation
Non-Mechanical Soil Aeration
- Soil microbes are Mother Nature’s soil aerators. Feeding soil microbes helps promote soil health. Learn more at this link.
Why Grass Dies Under Big Shade Trees
- Understanding why grass will not grow under trees is important to developing a solution. Learn more at this link.
Fighting Fungus in the Lawn
- Fight fungus before it shows up on your lawn. Learn more at this link.
Core Aeration vs. Verticutting
- What is the difference between core aeration and verticutting your lawn? Learn more at this link.
Why Grass Dies Under Your Shade Tree
Why Does Grass Die Under Shade Trees?
Customers come into our stores every fall and ask, “Why does my grass keep dying under my shade tree?” It’s always the same story, “My grass looked great after I overseeded last fall. It looked amazing in the spring but died out during the summer.” So the short answer is that trees are bullies.
Growing Grass Under Trees, It’s Not All About Sunlight
What would seem to be the most apparent resource in short supply would be sunlight; however, the area under the tree can be shady, but it is rarely too shady to sustain turf. So what is happening under the tree is that the tree will out-compete the turf grasses for resources necessary for a healthy life. The most significant shortage is water. Imagine how much water it takes to support a full-grown tree having several acres of leaf surface from which water evaporates.
Trees are Like Giant Drinking Straws
Trees draw up water from roots through a process of transpiration. Transpiration is water evaporation through the leaves. This evaporation creates negative water pressure and works much like a drinking straw using the tree’s xylem to draw water upward from the roots into the tree and, eventually, to the leaves.
The xylem is the water highway for plants to transport water and nutrients from the roots to the leaves. Grass plants also contain xylem. The grass xylem is a one-lane country road compared to a tree as a one-way eight-lane super highway. Consequently, the trees will move water faster and in higher volume than grass plants.
Why Shaded Grass Areas Grow Great in the Spring
Weather and the environment influence transpiration. The shorter daylight hours of spring, frequent rains, and cloudy weather reduce the transpiration process; thus, the tree uses less water, leaving plenty of moisture available for grass plants. As a result, the trees and grass are simpatico, and everyone gets along.
Why Shaded Grass Areas Die In the Summer
Unlike spring, during summer, we have infrequent rainfall, constant southern winds, extreme temperatures, and longer daylight hours, which will intensify transpiration. The rise in transpiration means the trees are sucking more water from the soil, sometimes hundreds of gallons per day, to support themselves. This situation creates a battle for water between the tree and your grass, and it is magnified during drought seasons.
How to Keep Grass Growing in Heavy Shade
Compensating for this unfair advantage, the tree holds over the turf; we try to level the playing field in several ways. First, always water the shaded areas more frequently during the hot, dry summer months. Second, Relieving compaction by mechanical core aerating and filling the aeration holes with Primera Sports Field Conditioner will increase the water-holding capacity.
Importance of Healthy Soil Under Large Trees
Tree roots need permeable soils to exchange air between the root zone and the atmosphere. This process is called respiration. Respiration is the opposite of photosynthesis. The tree roots take in carbon dioxide to produce sugars and oxygen as a food source. Less-than-ideal growing conditions for large trees will reduce the groundwater available from the soil to support the tree and your grass.
See Related: Fertilizing for Healthier Trees
Tree Roots Need Room to Grow and Spread
The feeder roots for trees will extend two to three times the tree’s drip line. The largest concentration of tree roots will be in the top two to three feet of the surface. Imagine a massive pin oak tree growing in the middle of a tiny front lawn. You have a house and foundation along one side of your yard, your driveway on one side, possibly the neighbor’s driveway on the opposite side, and a sidewalk or street on another. Where do you think those tree roots are going to grow? The root system that supports that 40-foot tree is super condensed into this tiny lawn. Surrounded by concrete, the pin oak is essentially planted in a huge concrete planter. When planting a tree, give the tree plenty of space to grow up and plenty of room for root growth.
Aerating the Soil Around Tree Surface Roots
Often areas with heavy root concentration leave large surface roots within the critical root zone and dense, compacted feeder root zones, making it almost impossible to core aerate mechanically to loosen the soil and allow better water and nutrient penetration. An alternative solution to a mechanical core aerator is non-mechanical soil aeration using a granular application of Soilbuilder C20.
See Related: Soil Builder Feeding Beneficial Soil Microbes
Trim Lower Branches to Help Grass Grow Under Trees
Lack of beneficial sunlight also plays a part in grass performance. Pruning lower branches to raise the canopy will help to increase sun exposure from the sides and allow for better wind circulation to fight turf disease. However, little can be done to improve the quality of sunlight coming from directly above. A university study found that 95% of the most beneficial sunlight is absorbed by the tree’s leaves, leaving little to land upon the grass plants.
As grass plants mature, more sunlight is required to maintain health and vigor. In full sun, grass blades reach towards the sky to soak up healthy sunlight and flourish. The grass plant reacts the same way in the shade, searching for quality light. Unfortunately, having reduced light levels result in a thinner and less vigorous grass plant. Weakened grass plants are less tolerant of drought, heat, and disease. In addition, the lack of vigor will affect turf density allowing weeds to invade thin areas.
Lessons Learned From Mother Nature
Mother Nature designed her baby grass seeds for sprouting and tolerating lower light conditions under the shadow of established taller grasses. Re-seeding dense shade areas three times a year (April, June, and September)) will add new generations of youthful, vigorous, and low-light tolerant grass plants to the maturing turf stand.
Best Grass Seed to Grow in Shade
Uncle’s Premium Shade grass seed is the ideal blend of elite grass seed varieties to introduce genetic diversity with lower water and nutrient requirements, improved shade tolerance, and disease resistance.
See Related: Five Tips for Growing Grass Under Shade Trees
More Related Articles to Growing Grass
5 Tips on Growing Grass Under Shade Trees
- Why grass won’t grow under big trees. Learn More at this Link
How Much to Water New Grass Seed?
- Planting new seed? How often should you be watering? Learn More at this Link
Seasonal Mowing Heights
- The seasons will determine how short or tall to mow your lawn. Learn More at this Link
Mowing Wet Grass
- Should you mow wet grass? Learn More at this Link
Preventing and Repairing Pet Damage
We love our pups! But as precious as our dogs can be, they can cause tremendous damage to your lawn. Maintaining dog runs along fences and repairing pet urine spots remain among our most asked-about problems to be solved. Here are some things you can do on your lawn to minimize pet damage and maintain dog runs.
How to Keep Pet Urine Spots from Killing Grass
Pet and animal urine can leave behind unsightly dead spots in your lawn, usually in areas where the dog or pets frequently urinate. To prevent pee spots from appearing in your yard, apply Lawn Cal at a rate of 40 lbs per 1,000 sq. ft. over the entire pet area in early spring and fall. Supplementing beneficial calcium into the soil, along with adequate watering, will assist in the leaching of the high concentrations of harmful elements contained in pet urine, facilitating their movement through the soil structure, away from the grass roots, and allowing the grass to stay green and healthy. In addition, Lawn Cal is a naturally occurring compound safe around kids and pets. Apply Lawn Cal twice yearly for optimum results.
Uncle’s Tip: Water those pet areas frequently to assist in moving the harmful elements through the soil. Pet urine contains small amounts of nitrogen. Fertilize your lawn more regularly if dark green spots are considered the problem.
How to Fix Dog Urine Spots in the Yard
Repairing pet spots is simple. Rake and remove any loose debris from the area. Next, apply Primera Sports Field Conditioner layer over the bare soil, approximately 3/8 inch thick. This layer will isolate the seed from any pre-emergent herbicides in the soil. Next, use your favorite Grass Pad grass seed at the heavier bare soil rate. Cover the grass seed with a thin Primera Sports Field Conditioner layer, then water routinely. When seedlings reach 3 to 4 inches, mow to 3 inches with a sharp mower blade when the lawn is dry.
Uncle’s Tip: Water seeded areas lightly and frequently to keep them evenly moist. DO NOT LET THE SEEDS DRY OUT!

What is Lawn-Cal?
Lawn Cal improves clay soils. An agricultural-grade pelletized gypsum, Lawn-Cal is an excellent source of calcium and sulfur for lawn or garden. Lawn-Cal is essential for healthy soil and vigorous plant growth. Used as a soil improvement, Lawn Cal reduces compaction by increasing water and air infiltration, which assists in neutralizing the negative effects of salt and other excessive elements in the soil.
Tips for Repairing Dog Runs
Dog runs along fences and paths form over time from the daily routine in a dog’s life. Running repeatedly in these same pathways causes the soil to be compacted. The most severe soil compaction occurs when soils are waterlogged, noticeably in early spring after a wet winter’s thaw. The larger the dog, the worse it can get without some routine maintenance. Soil compaction leaves little oxygen available to the roots, making it difficult for the grass to grow. Relieving soil compaction helps the soil to support healthy turf growth. Applying Lawn Cal over the entire yard each spring and fall will help to reduce soil compaction. In addition, core aerate your heaviest traffic areas every fall.
Uncle’s Tip: Avoid using solid-tine aerators in clay soils. For best results use a hollow core aerator and pass over the compacted areas at least 2-3 times. Apply Primera Sports Field Conditioner after aerating by raking or sweeping the Primera Sports Field Conditioner calcined clay chips into the core holes. The entire lawn will also benefit, especially if you have poor drainage.
Growing Grass on a Race Track
Like sports fields, dog runs with the heaviest traffic should be frequently over-seeded with Stadium Special, a sports turf perennial ryegrass blend. Stadium Special is tolerant of intense traffic and blends very well with bluegrass or fescue lawns. If your backyard is home to several large dogs, stay ahead of the game and overseed your entire lawn with Macho Mix fescue or Estate Mix bluegrass, each of these blends contains a portion of sports turf perennial ryegrass.
Uncle’s Tip: On soccer practice fields, grounds crews move the goals to manage the amount of abuse around the goal area. Give Phido boundaries and rotate those boundaries through the season. Let him run on one side of the yard while the other is repairing. This is difficult, but it would be the ideal repair solution.
Fertilize and Water Dog Runs
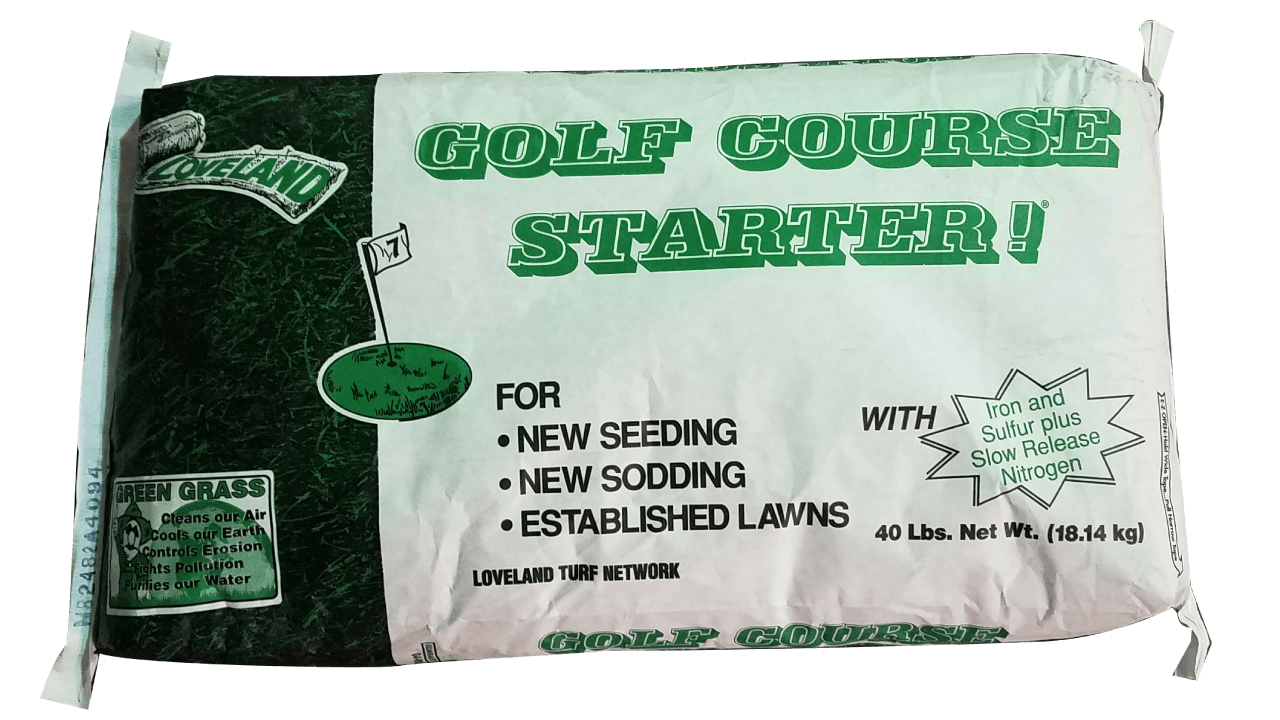
Golf Course Starter or Renovator should be applied every four weeks during the spring & fall growing seasons. Water your lawn regularly during the dry summer months. Watering in the morning is recommended to avoid turf fungus. A deep watering applied infrequently is best. Average watering should be one inch per week. Hot summers with excessive heat may require up to two inches per week.
Are These Products Pet Friendly?
It is impossible to eliminate all risks inherently associated with any organic or inorganic lawn products. There are hazards and cautions for sugar and table salt as well. However, we recommend watering each product with at least ½ inch of water and letting the lawn dry before allowing pets access to be on the side of caution. And as always, we recommend reading the entire label before any application and following all label recommendations. We’ve been doing this for 60 years and haven’t lost anyone yet.
More Related Articles on Pets and Lawn Care
Fleas, Ticks & Chiggers!
- Control biting insects that can spread infections and disease. Learn more at this link.
Mulches for Landscapes
- How to read the types of mulches and how they are used. Learn more at this link.
Healthy Lawns Need Calcium
- Lawn Cal is essential for healthy soil. Learn more at this link.
What is a Core Aerator?
- What is a core aerator and how do they work? Learn more at this link.
Japanese Beetle Control
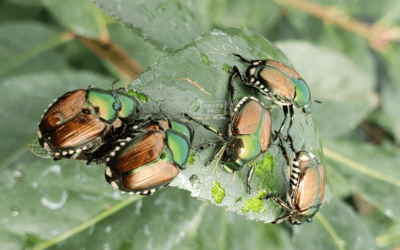
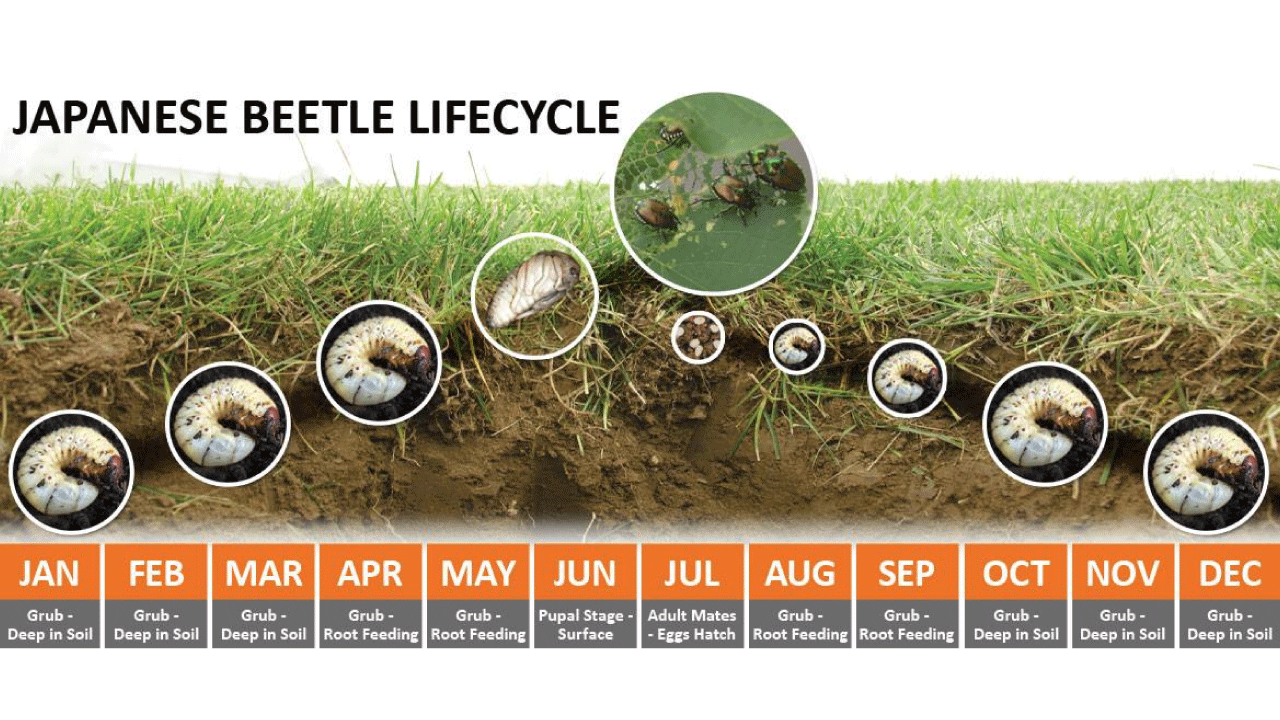
Japanese beetles are this generation’s destroyer of the landscape. These little metallic militants appear in swarms in July and last for months. They are feeding on their favorite plants and when those are decimated, they move on to the next. They love roses, fruit trees, vegetables and especially linden trees. Reducing the Japanese beetle population requires a different strategy than the traditional preventative control for white grubs. Protecting our favorite roses and fruit trees will involve treatments for adult beetles as well as the grub stage.
Best Control for Japanese Beetles
Both as adults and as grubs, Japanese beetles are destructive plant pests. Adults feed on plant foliage, mate, and lay eggs, and the carnage continues when the next generation hatch. Japanese beetle larvae feed on turf grass roots. Unlike the traditional masked chafer, May beetle, and June Bug, the Japanese beetle lays eggs and has multiple hatchings. Effective Japanese beetle control will now require multiple phases of curative and preventive applications.
Curative Controls for Beetles in Trees and Shrubs
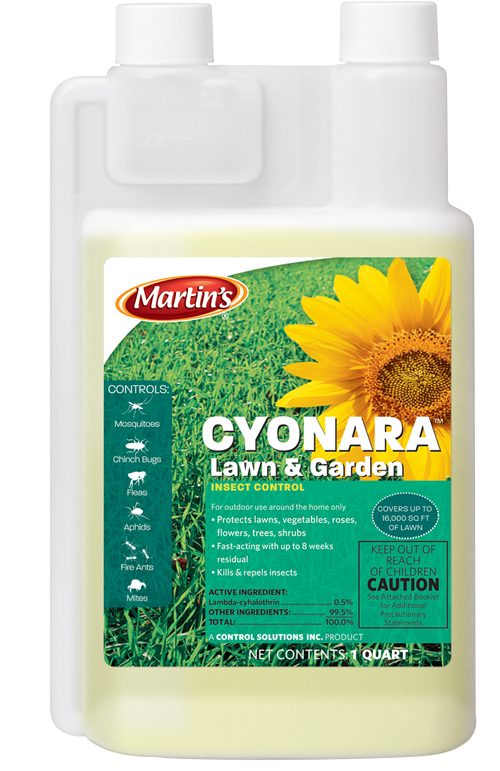
Swarms of adult Japanese beetles are more of a challenge to control. The best method is to spray them with Cyonara Lawn & Garden, Bifenthrin or Malathion. These products are compatible with most fruit and vegetable crops as well as landscape plants. If you discover just a few beetles, they can easily be picked off and dropped into a bucket of soapy water.
Cyonara Lawn & Garden is a broad-spectrum insect control product. In addition to Japanese Beetles, Cyonara Lawn & Garden kills spider mites, fleas, aphids, fire ants, chinch bugs and more.
Prevent Japanese Beetle Damage in Trees & Shrubs
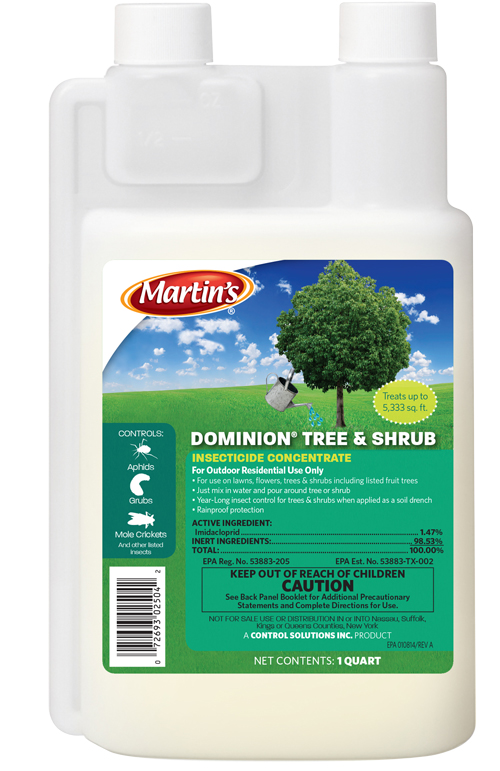
Preventative treatment for adult beetles on shrubs and trees* begins in early May with a soil drench application of Dominion Tree & Shrub Insecticide. A direct soil application of Dominion Tree & Shrub around trees and shrubs should be applied before Mother’s Day to provide systemic control with up to twelve-month residual. The insecticide is absorbed into the plant, killing any insect that eats the leaves or bark. This product not recommended for use around linden trees.
* Be Safe! Always read the label before using any pesticide. Follow all label instructions.
Curative Control for Japanese Beetle Grubs
The Hail Mary is applying Quick Kill Grub Control in the middle of September as Long Lasting Grub Control has faded. Quick Kill is the only effective contact-kill for white grubs. It is very fast acting with a short active life. It’s important to water heavily after application to help penetrate any thatch in the yard. If the problem recurs, you can apply a second or third dose of Quick Kill Grub Control.
Prevent Japanese Beetle Grub Damage
As the Japanese Beetles move through their life cycle, they will start to lay eggs in the grass. To prevent grub damage, treat the yard with Long Lasting Grub Control in early summer before the lawn goes under heat stress. This preventative treatment is designed to be applied before a potential grub problem develops. It is normally applied in late June to early July and kills the baby grubs as they hatch. Long-Lasting Grub Control will stay active in the lawn for about ninety days.
Why Japanese Beetles Do So Much Damage?
Japanese beetles reproduce at very high rates, unlike their cousin, the masked chafer (the “June bug”) that lives only a few weeks. The adult Japanese beetle lives for months to eat, mate, and lay eggs recurrently. Once the eggs start to hatch into grubs, continuous waves of ravenous white grubs begin feeding on the roots of your grass.
Why do Japanese Beetles Swarm?
Plant odors attract both sexes to potential food sites. Japanese beetle feeding produces odors which act as pheromones to attract other Japanese beetles to the area to feed and mate. Pheromones are chemical odors used by insects to communicate.
Where Did Japanese Beetles Come From?
Originally from Asia, Japanese beetles were brought over to the United States in 1917 into New Jersey. Currently the insect can be found in all states east of the Mississippi River, except Florida and Louisiana.
About Japanese Beetle Pheromone Traps
We discourage the use of beetle pheromone traps; however, beetle traps do work in that they capture adult beetles. However, placement is critical. DO NOT place the traps near any plant material you do not want the beetles feeding on. Although the trap is quite effective in attracting the beetle, only about 70 percent of the beetles end up in the trap. In addition, pheromone traps attract more beetles to your property than would have visited your property naturally. Research has shown that putting the traps on the perimeter of the property well away from valuable plantings or vulnerable crops may be the best use of the traps. Traps work better if you also get your neighbors to set out traps. Use a community-wide approach of 25 to 50 traps per square mile.
More Related Articles to Insect Controls
Long Lasting Grub Control
- White grubs can be one of the most damaging insects to your turf. Learn More at this Link
Ankle Biters
- Warm weather brings annoying pests to the backyard. Learn More at this Link
Controlling Bag Worms
- Stop the summer weed invasion. Learn More at this Link
Control for Emerald Ash Borer
- The most damaging insect to ash trees in our area. Learn More at this Link
Fall Army Worm Control
- In a typical year, fall armyworms are of no concern. Learn More at this Link

